Mac Computers – Virtual Keyboard Instructions
In order to type in certain languages, you may need to add a new virtual keyboard. This guide will explain how to add virtual keyboards on Mac OS and choose the correct settings for each language.
Language Keyboard Instructions
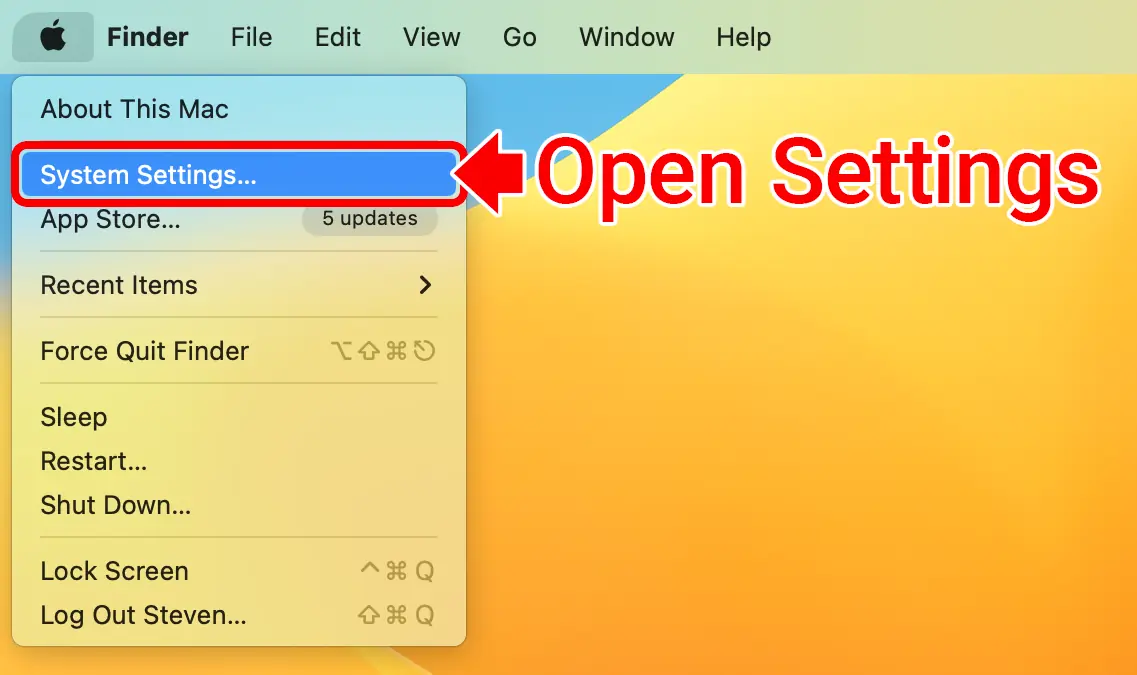
1 .Open “System Settings” (under the Apple icon).
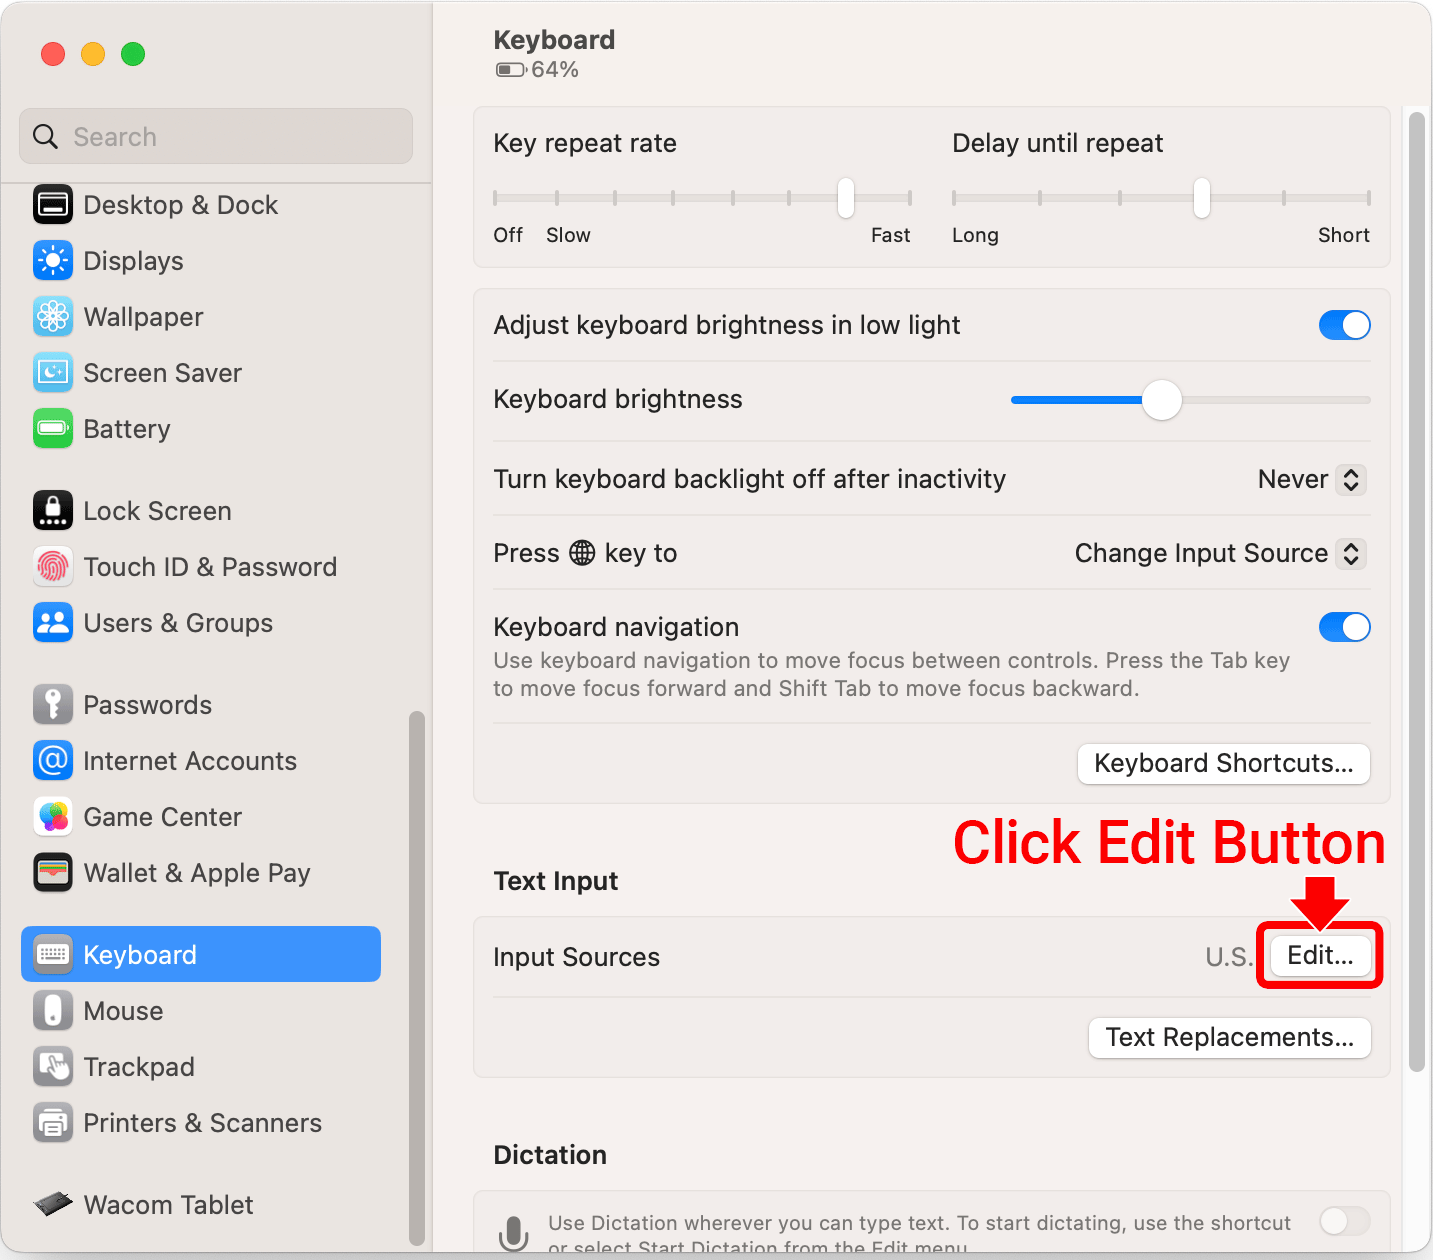
2. Click Keyboard (on the left). Then click the “Edit” button (under “Text Input”).
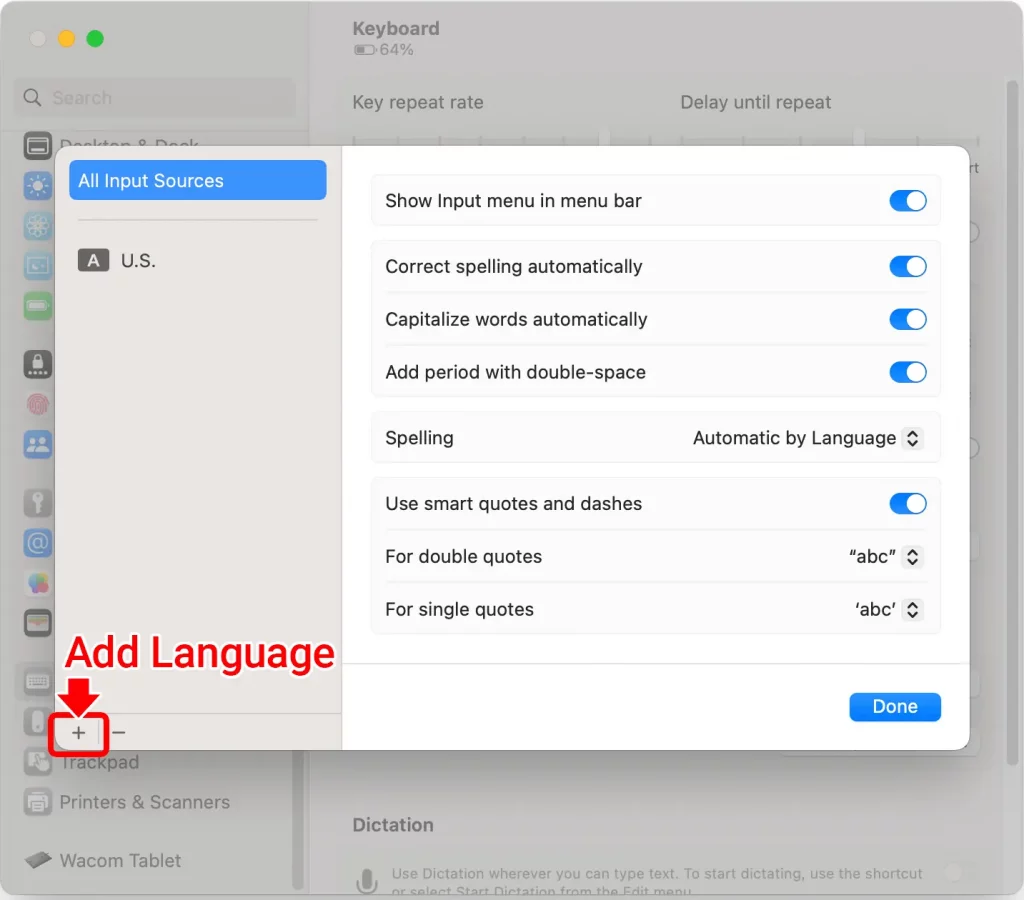
3. Turn on “Show Input in menu bar”. This will add a language switcher button (![]() ) in the top-right of your screen.
) in the top-right of your screen.

4. Click the + icon in the bottom-left corner.
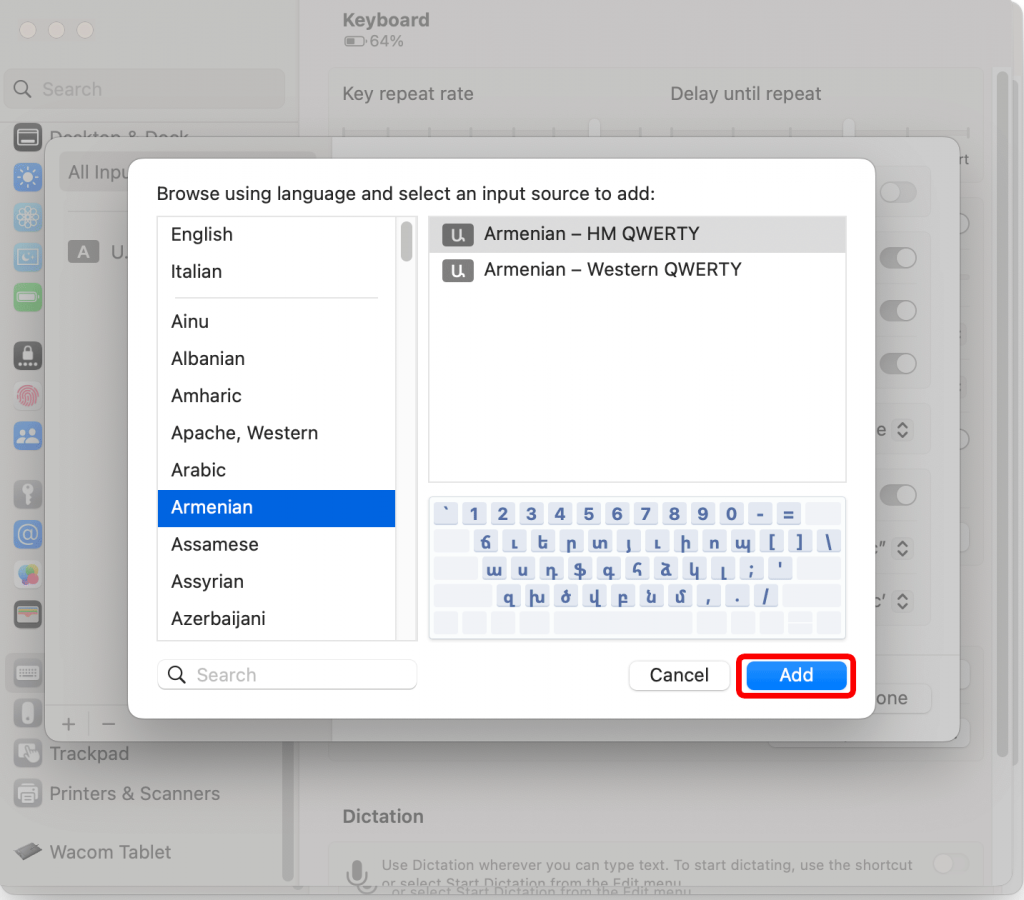
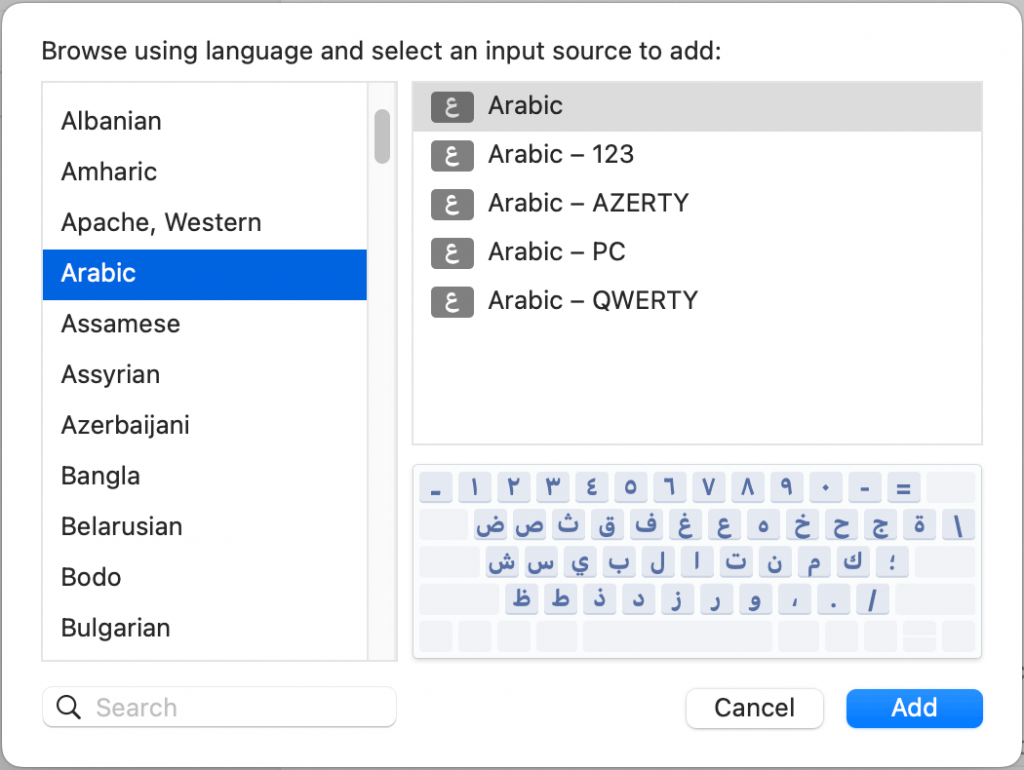
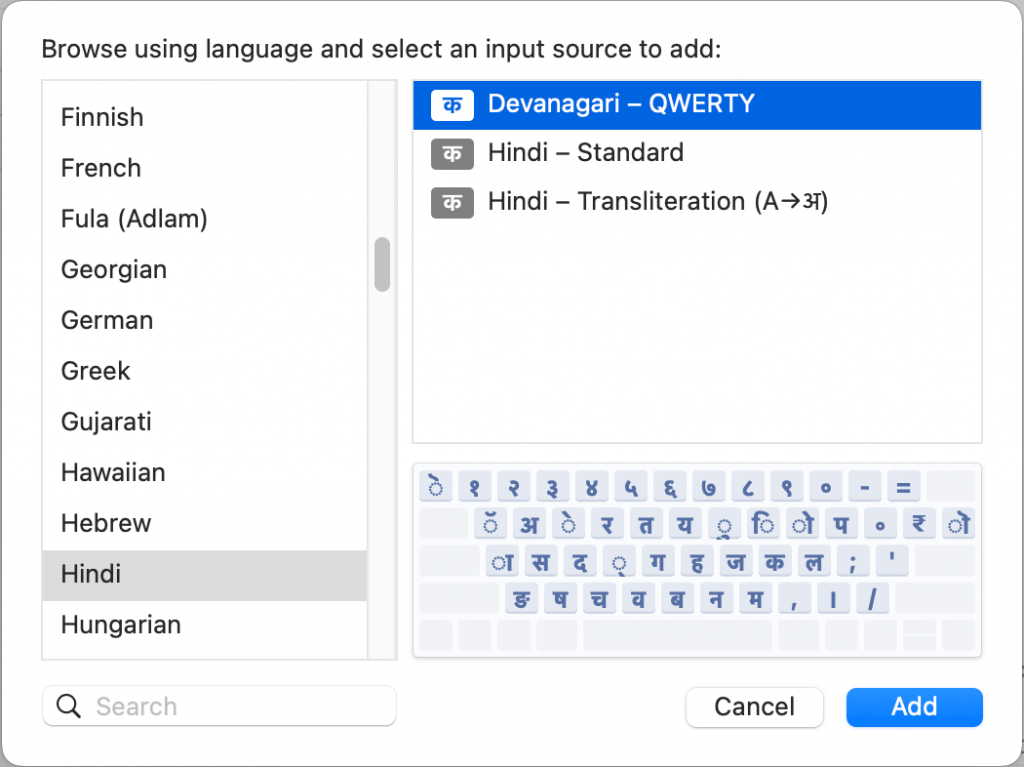
5. Choose the language and keyboard layout option. Then click the “Add” button.
6. Click the input icon (in the top-right corner) to change your keyboard.
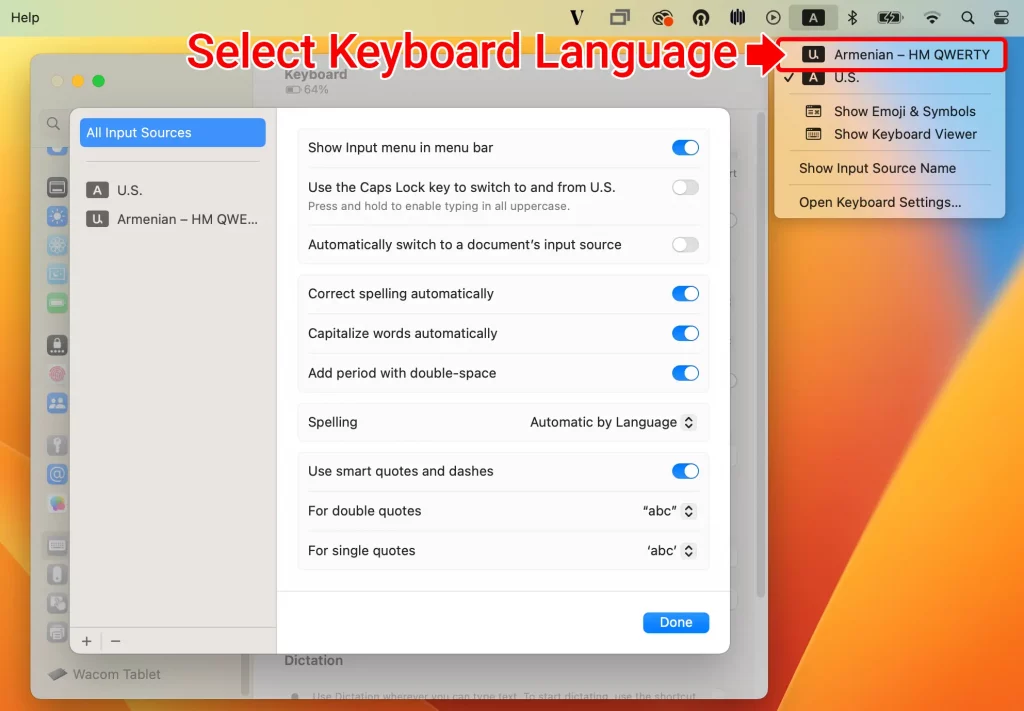
Try typing. You should find that you are now writing in your selected language.
View Virtual Keyboard Layout
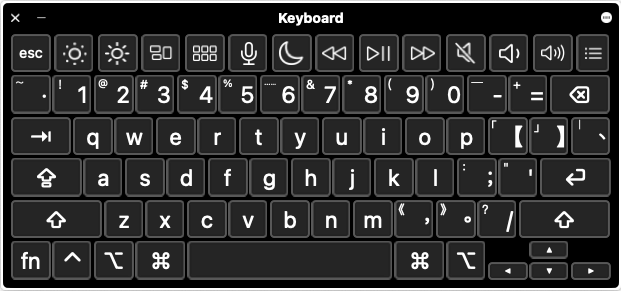
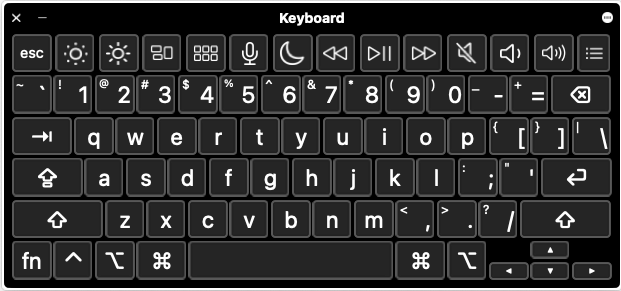
Click the input icon and choose “Show Keyboard Viewer”.
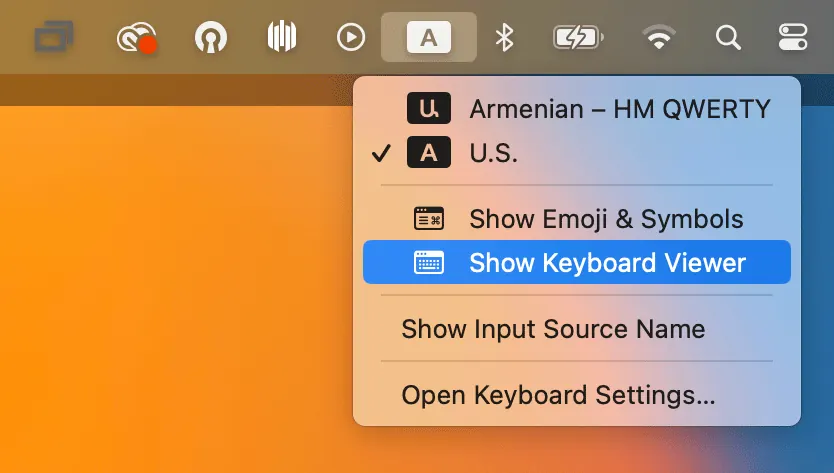
A virtual keyboard will show the layout for your selected language.
Easy Ways to Type Accented Characters
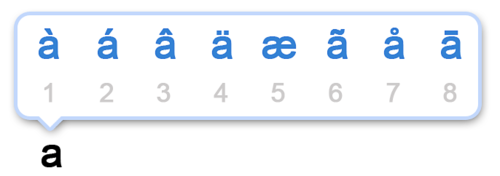
Mac OS also allows easily typed accented letters and diacritical marks by using a sustained keypress on a single key. For example, if you press and hold on “a” a pop-up will appear after holding that key for a few moments which displays which accents are available for that particular letter or character.
- Press and hold on the letter you wish to accent, continue holding the letter until a menu with character accents are displayed.
- Choose the character accent with the mouse, or press the number corresponding below the accent in the menu.
If this accent sub-menu feature isn’t available to you, it’s likely because you either have a fairly old version of system software, or perhaps you disabled the accent menu to favor key repeat instead.
Language Specific Instructions
Following the previous instructions, Step 5 will vary for each language.
The following section shows which keyboard layout should be used for each language.
Amharic
Choose Amharic > Ge’ez

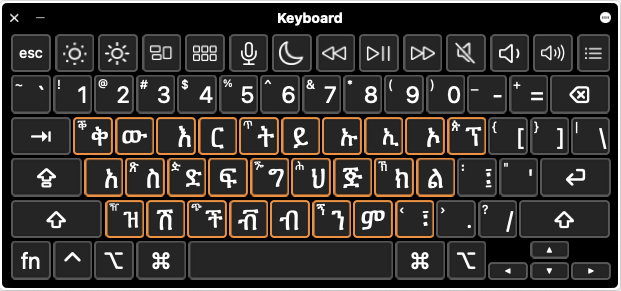
The Amharic keyboard will look like this:
Arabic
Choose Arabic > Arabic
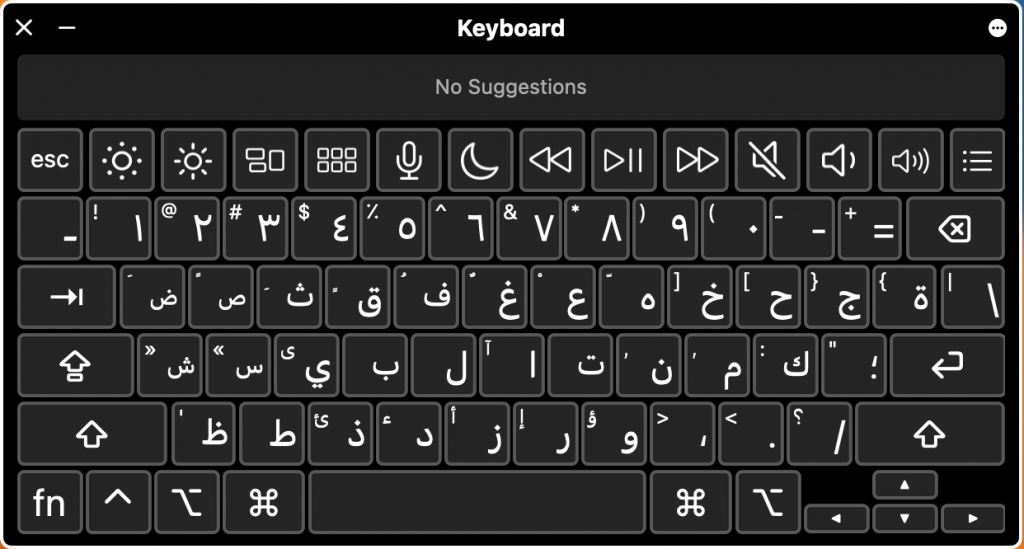
The Arabic keyboard will look like this:
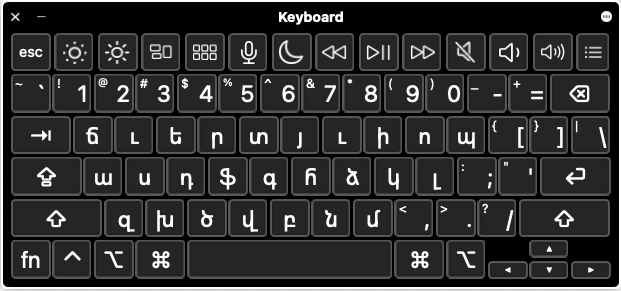
Armenian
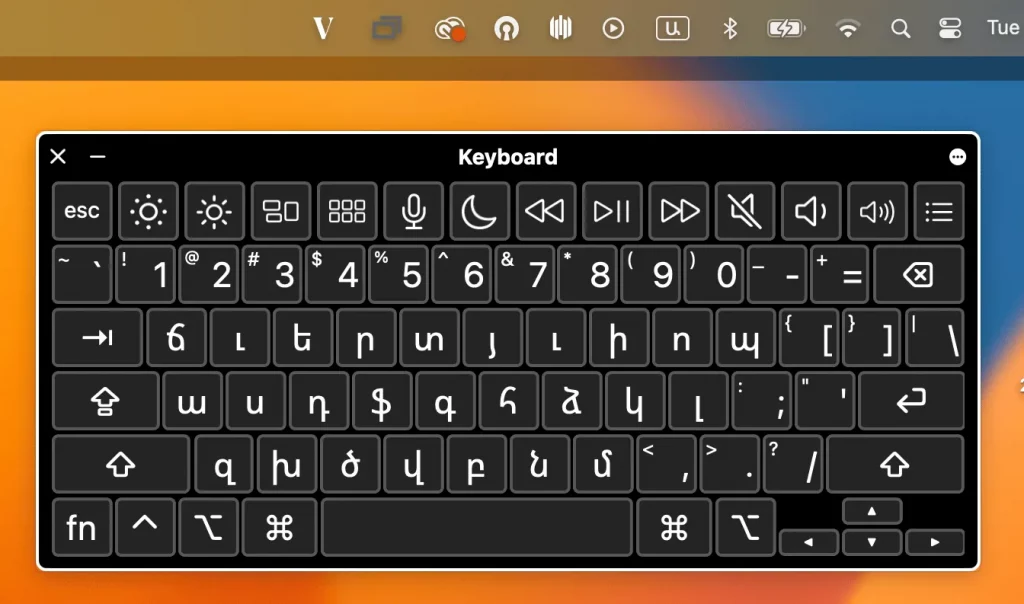
Choose Armenian > Armenian – HM QWERTY
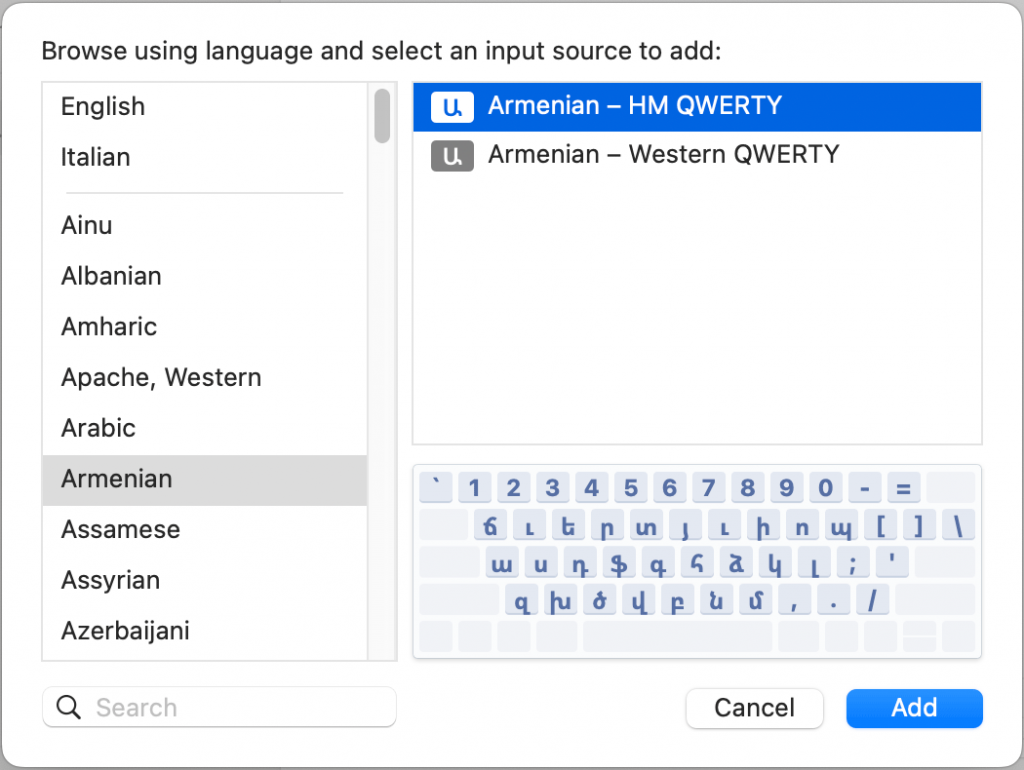
The Armenian keyboard will look like this:
Bengali
Choose Manipuri (Bangala) > Manipuri (Bengali) – Standard
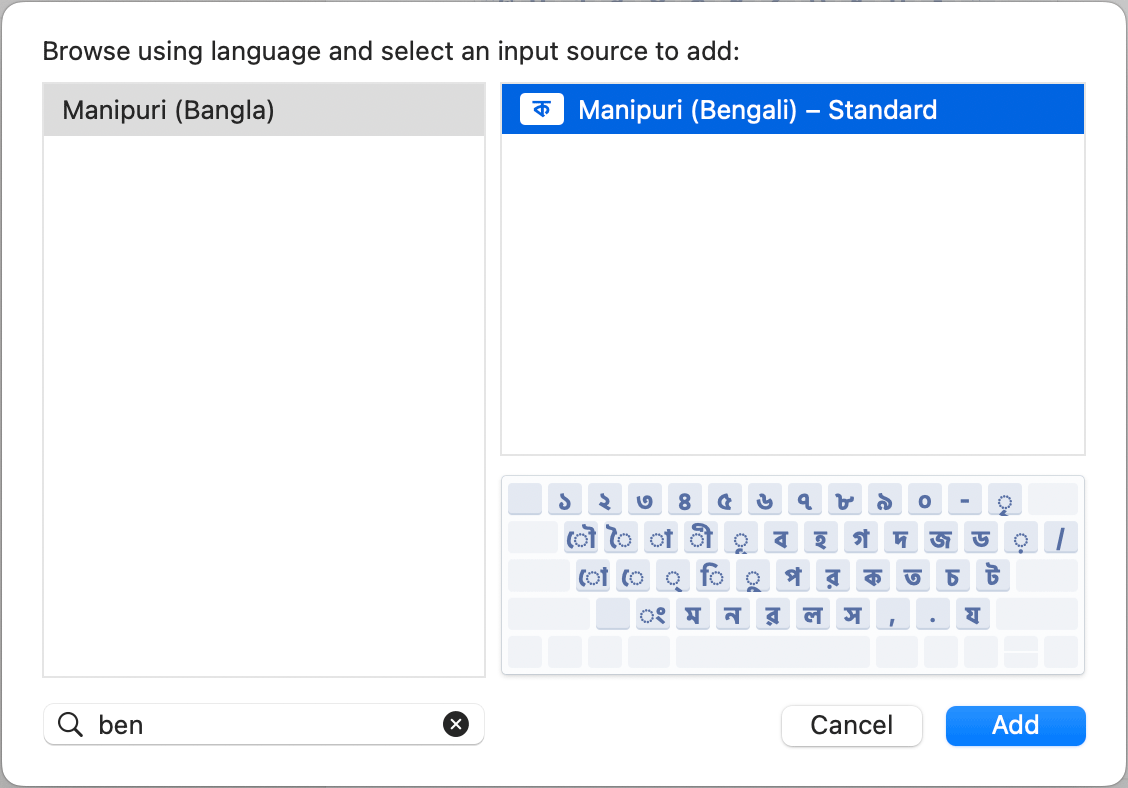
The Bengali keyboard will look like this:

Chinese Simplified
Choose Chinese, Simplified > Pinyin Simplified
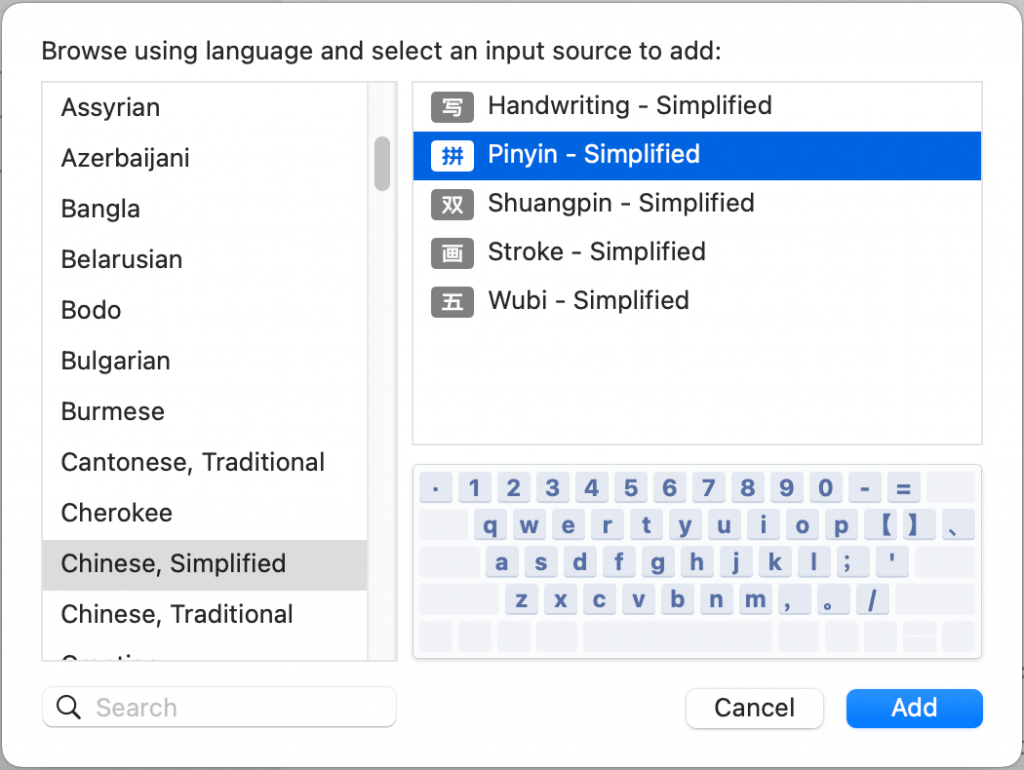
Note: There is no keyboard layout for the Chinese, Simplified – Pinyin Simplified keyboard layout because phrases are spelled out with letters from the English Alphabet.
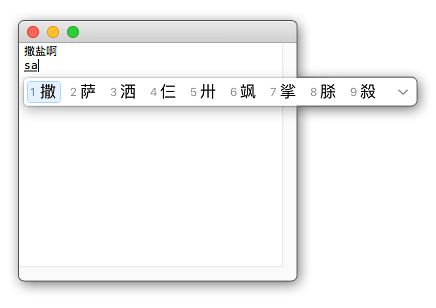
How to Type in Chinese Simplified:
- Typing in Chinese Simplified begins with typing the pronunciation of the word (Pinyin) and then hitting the space bar to bring up a list of Chinese Simplified characters to choose from.
Important: If test takers use Pinyin* in the response (not Chinese characters), they will top out at the Novice-High level. To score at the Intermediate level or higher, test takers MUST show the ability to use characters.
*Pinyin is the Romanization of the Chinese characters based on their pronunciation. In Mandarin Chinese, the phrase “Pin Yin” literally translates into “spell sound”. In other words, spelling out Chinese phrases with letters from the English alphabet.
Chinese Traditional
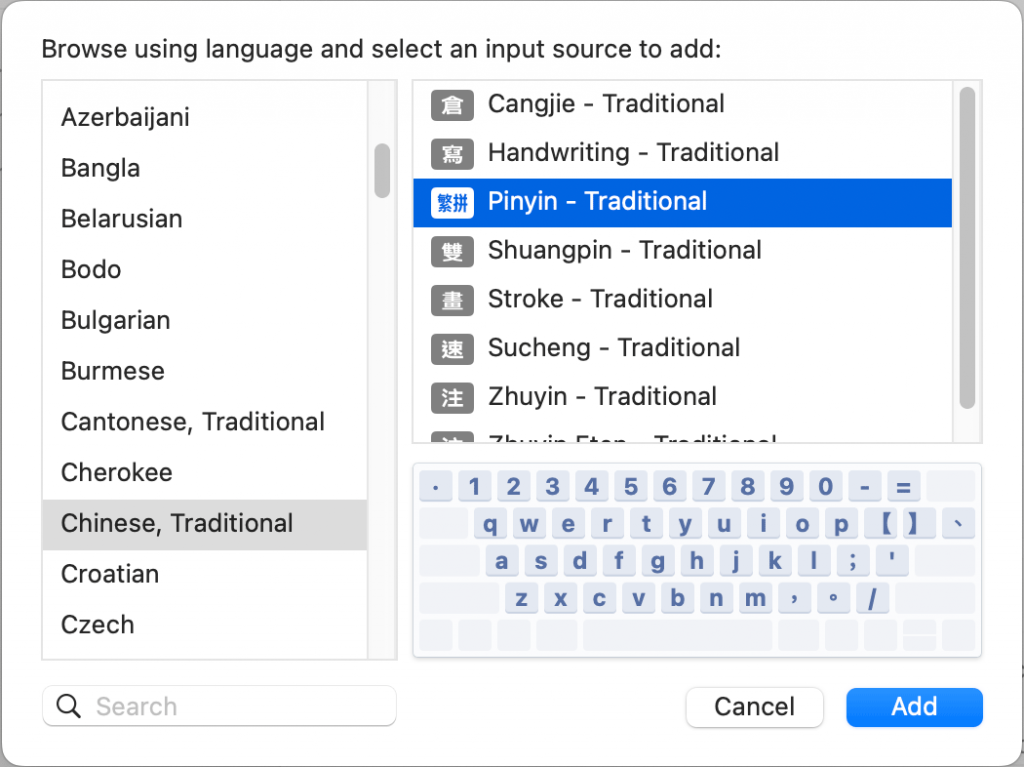
Choose Chinese Traditional > Pinyin – Traditional
Note: There is no keyboard layout for the Chinese, Traditional – Pinyin Traditional keyboard layout because phrases are spelled out with letters from the English Alphabet.
Important: If test takers use Romaji* (not changing that to Hiragana, Katakana, or Kanji), they will top out at the Novice-High level. To score at the Intermediate level or higher, test takers MUST show the ability to use characters.
* Romaji is the Romanization of the Japanese characters based on their pronunciation. In Japanese, the phrase “Romaji” literally translates into “roman letters”. In other words, spelling out Japanese phrases with letters from the English alphabet.
Greek
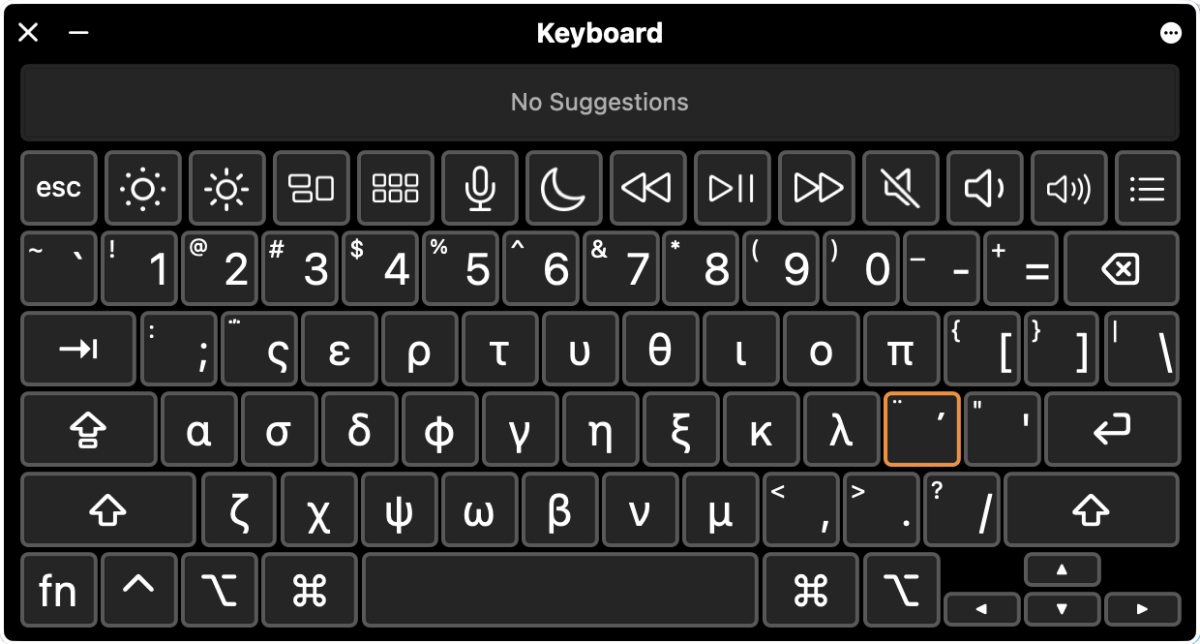
Choose Greek > Greek
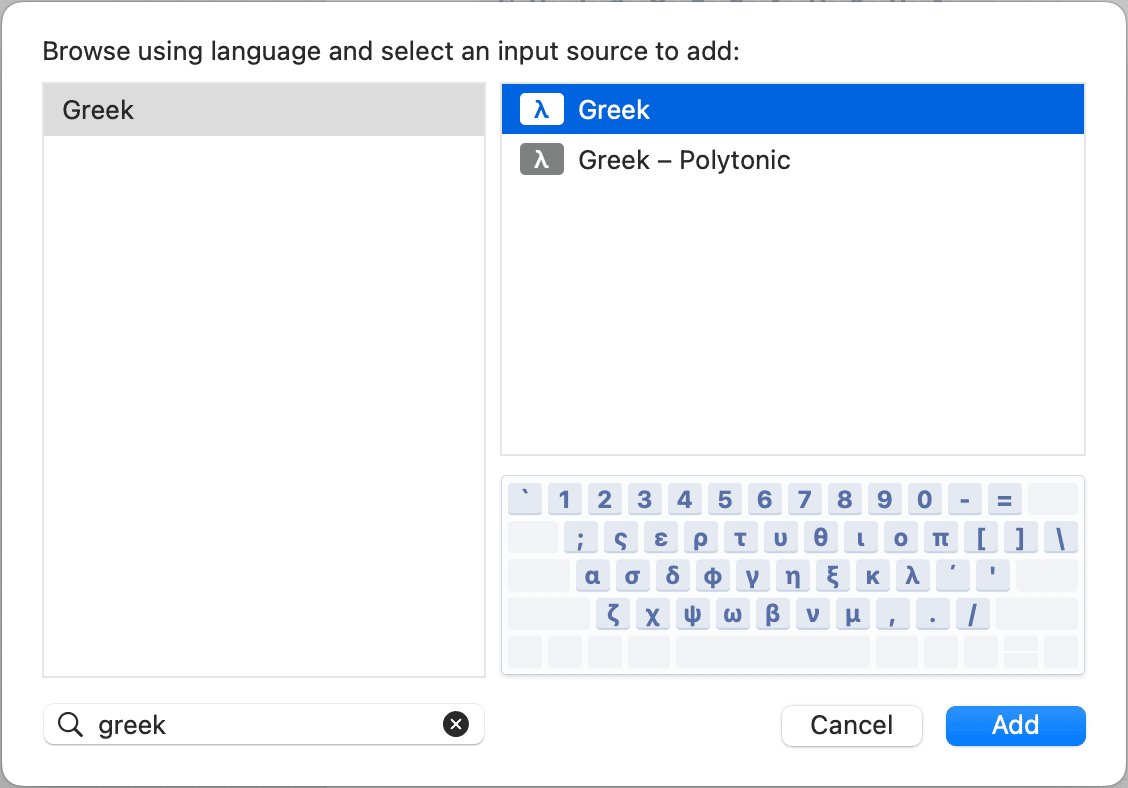
The Greek keyboard will look like this:
Hebrew
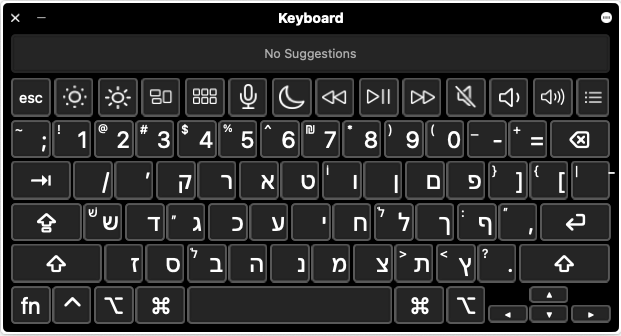
Choose Hebrew > Hebrew

The Hebrew keyboard will look like this:
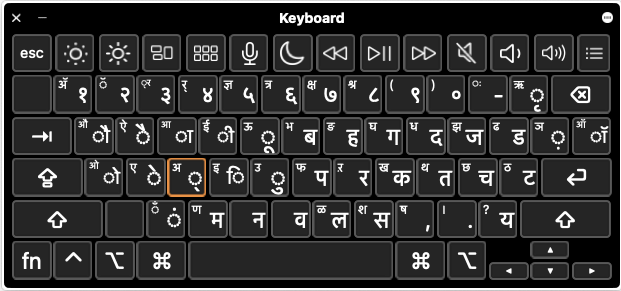
Hindi
Choose Hindi > Devanagari – QWERTY
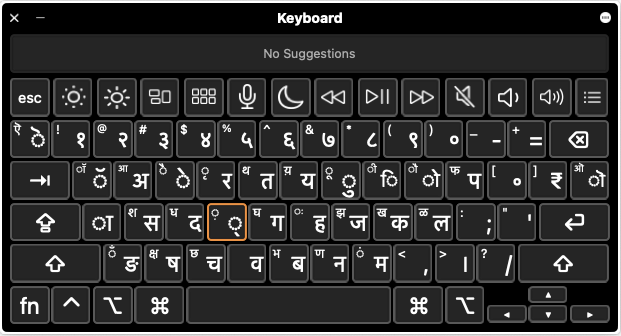
The Hindi > Devanagari – QWERTY keyboard will look like this:
Japanese
Choose Japanese > Japanese – Romaji
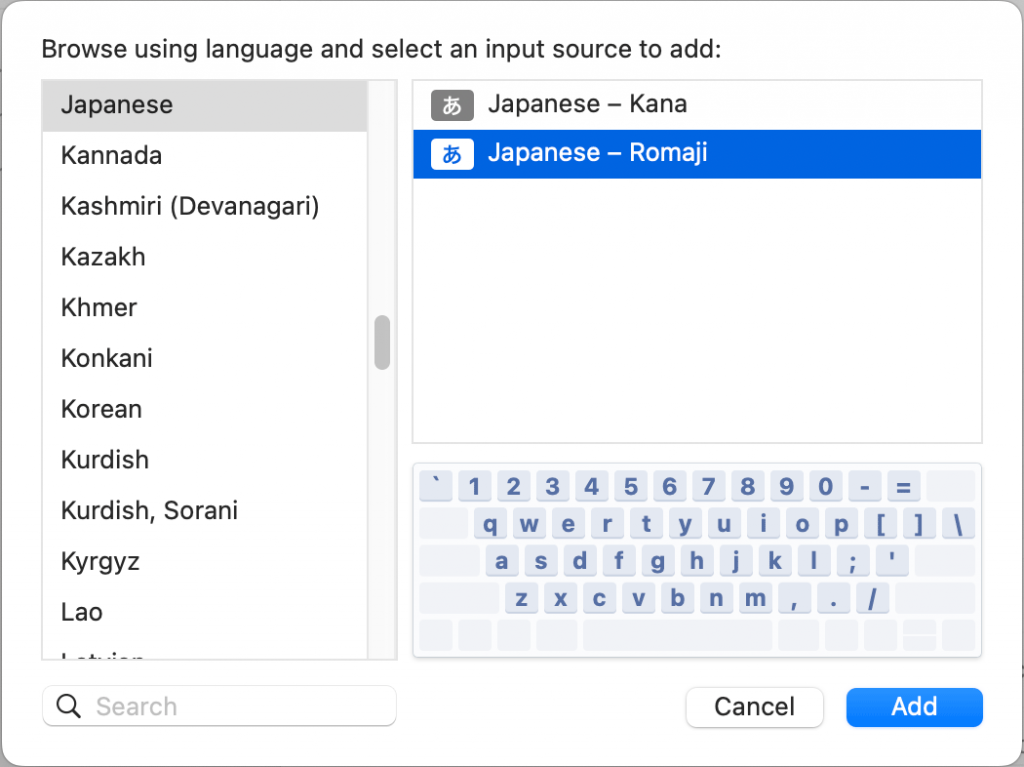
Note: There is no keyboard layout for the Japanese keyboard because phrases are spelled out with letters from the English Alphabet.
Important: If test takers use Romaji* (not changing that to Hiragana, Katakana, or Kanji), they will top out at the Novice-High level. To score at the Intermediate level or higher, test takers MUST show the ability to use characters.
* Romaji is the Romanization of the Japanese characters based on their pronunciation. In Japanese, the phrase “Romaji” literally translates into “roman letters”. In other words, spelling out Japanese phrases with letters from the English alphabet.
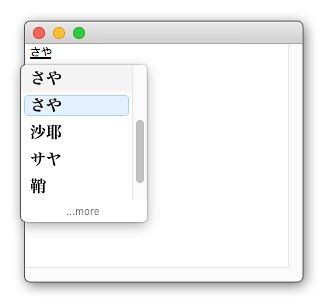
Type in Japanese:
- Typing in Japanese begins with typing the pronunciation of the word with letters from the English alphabet, and then hitting space bar to bring up a list of Japanese characters to choose from.
- Note: You may need to hit the SHIFT button.
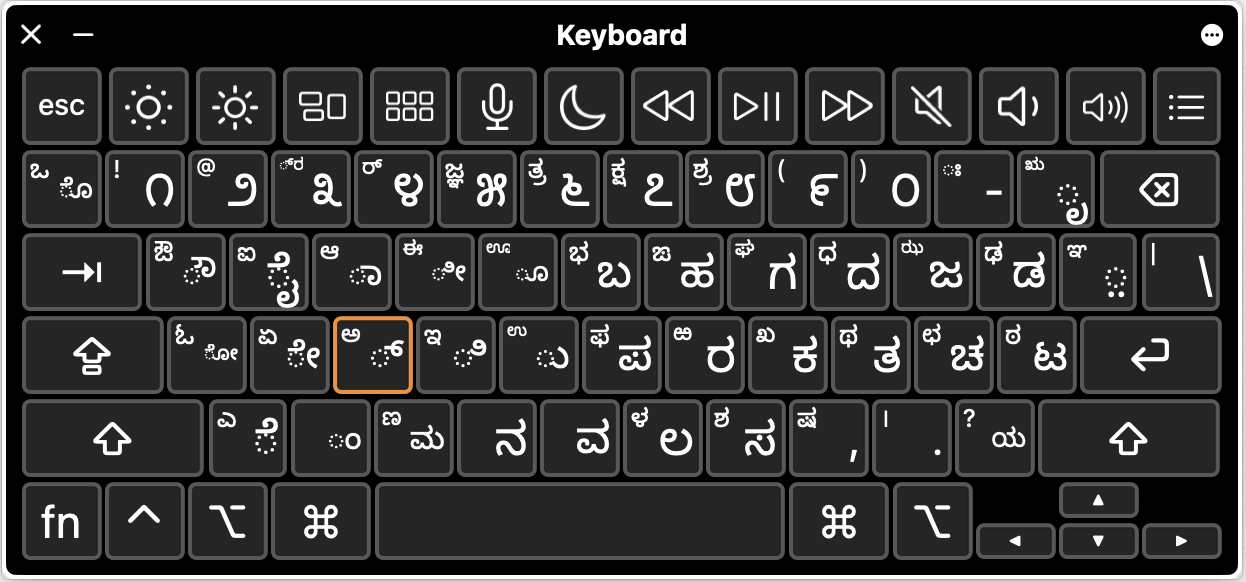
Kannada
Choose Kannada > Kannada – Standard
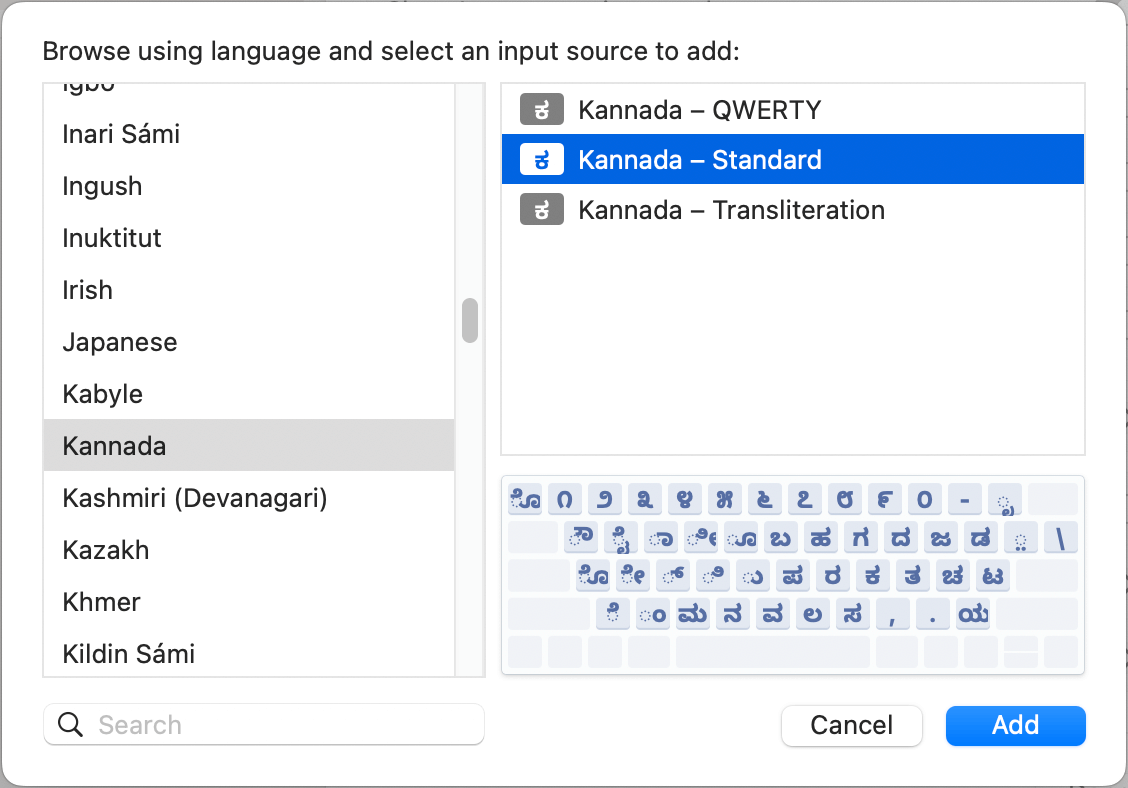
The Kannada keyboard will look like this:
Khmer
Choose Khmer > Khmer

The Khmer keyboard will look like this:

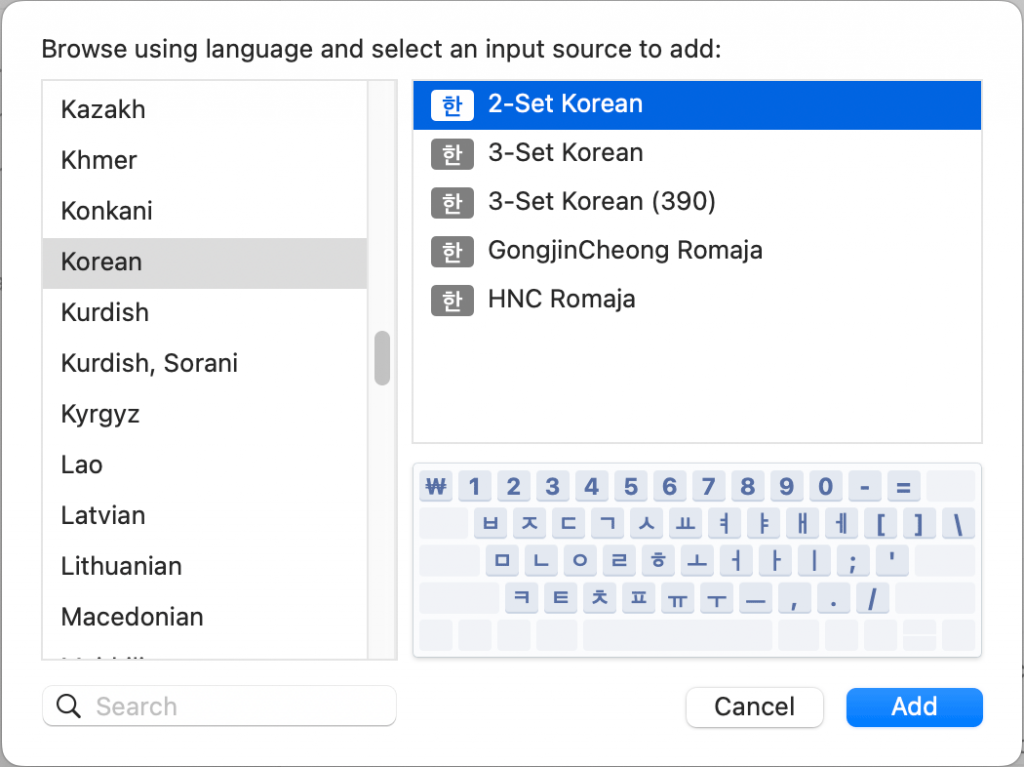
Korean
Choose Korean > 2-Set Korean
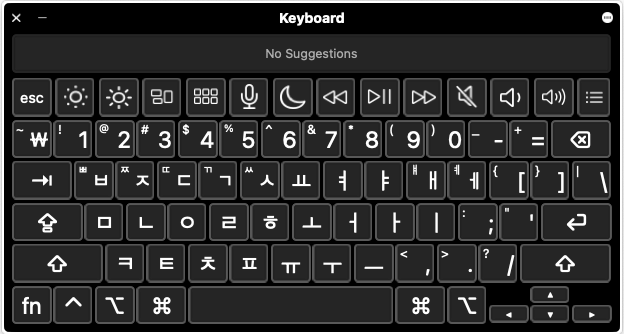
The Korean keyboard will look like this:
Marathi
Choose Marathi > Marathi – Standard
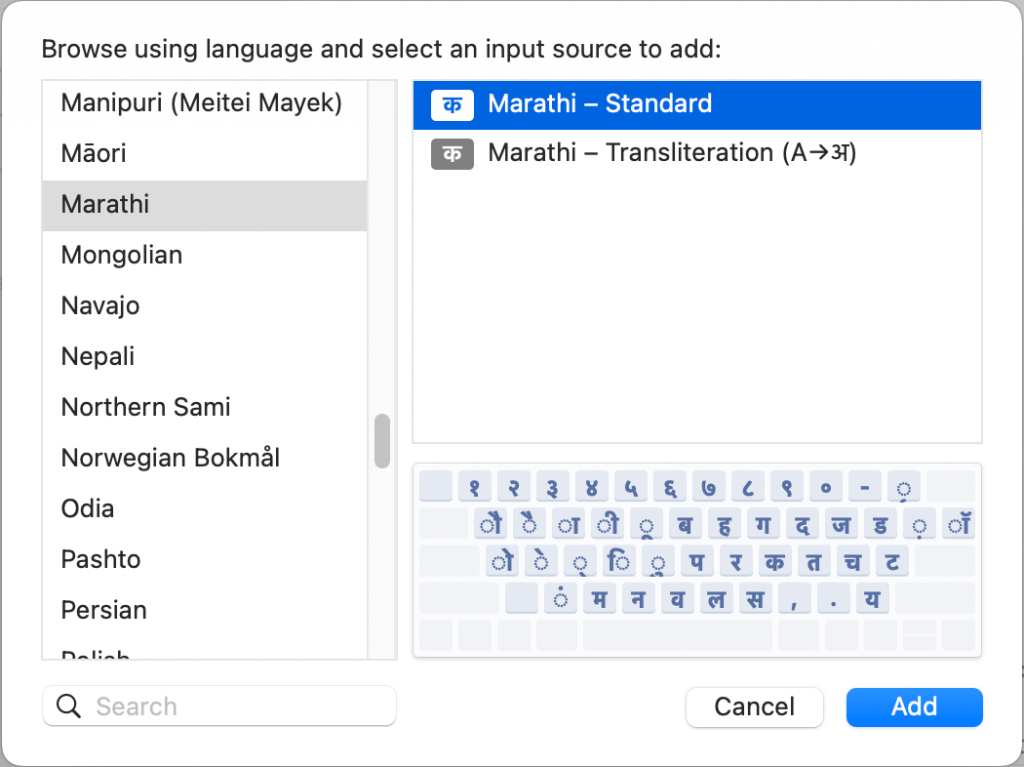
The Marathi keyboard will look like this:
Nepali
Choose Nepali > Nepali – Standard (India)

The Nepali keyboard will look like this:

Pashto
Choose Pashto > Afghan Pashto

The Pashto keyboard will look like this:

Persian-Farsi
Choose Persian > Persian – Standard

The Persian keyboard will look like this:

Punjabi
Choose Punjabi > Gurmukhi – Standard

The Punjabi keyboard will look like this:

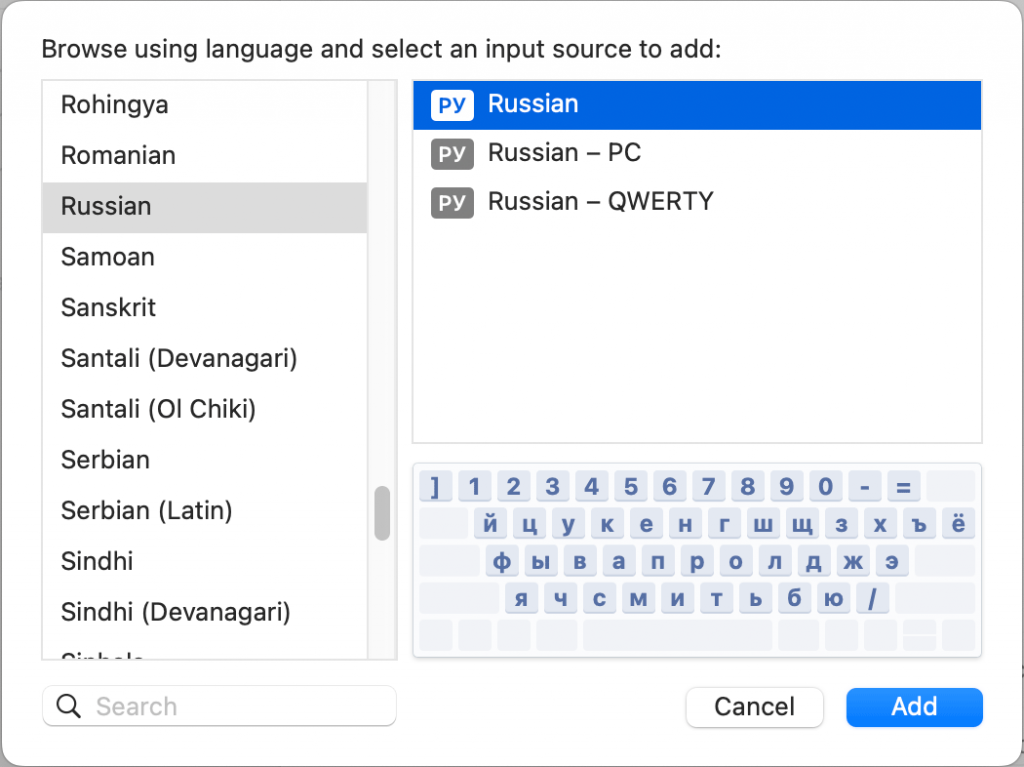
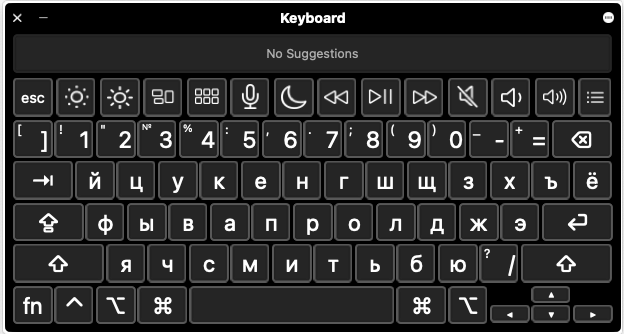
Russian
Choose Russian > Russian
The Russian keyboard will look like this:
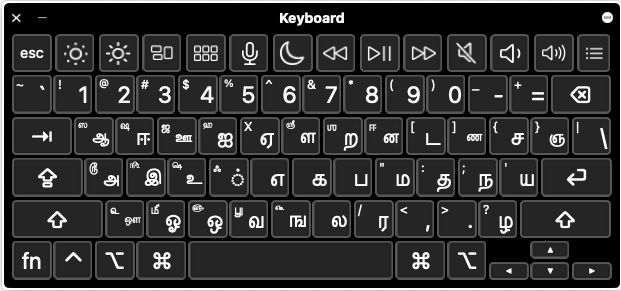
Tamil
Choose Tamil > Tamil 99
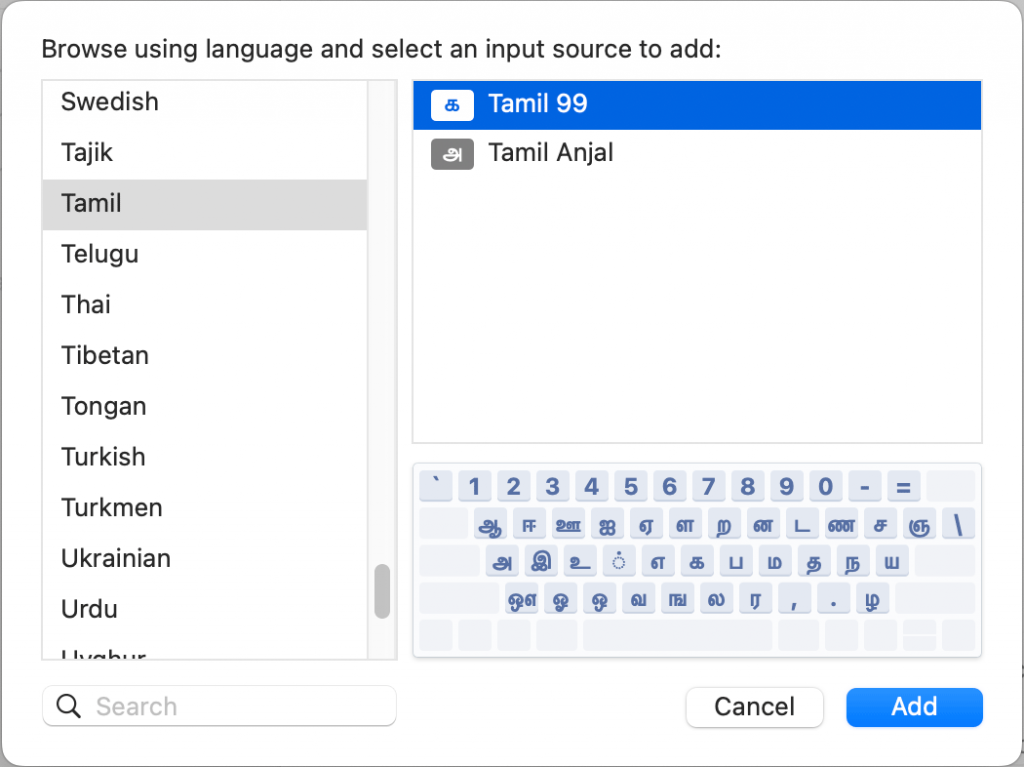
The Tamil keyboard will look like this:
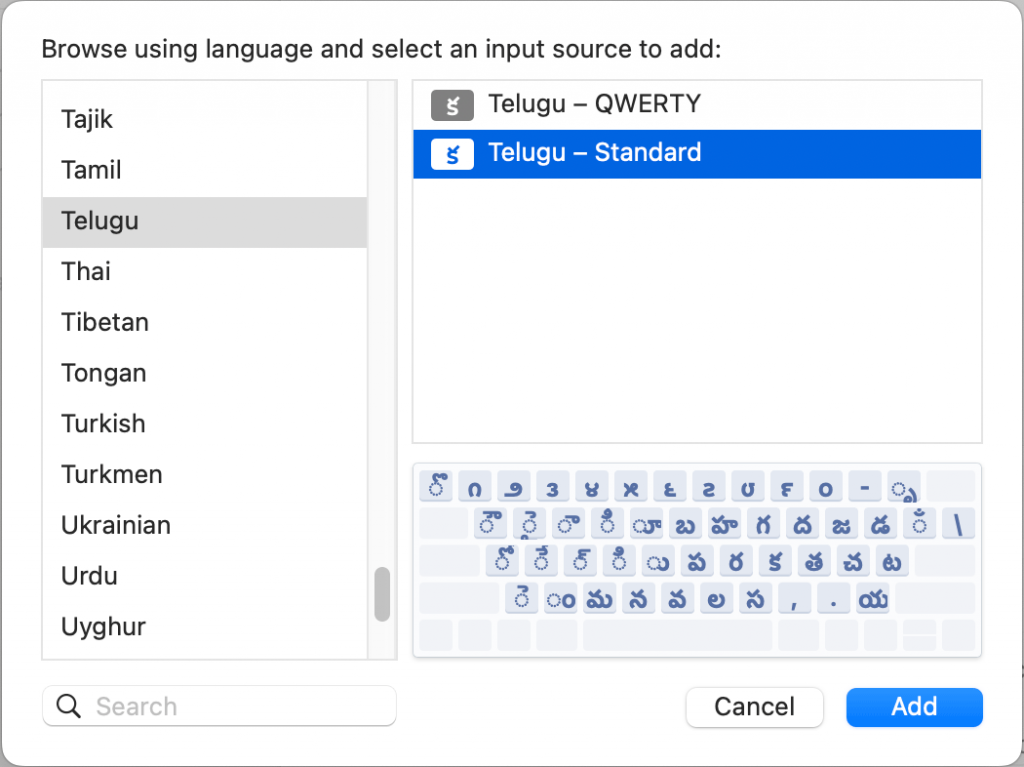
Telugu
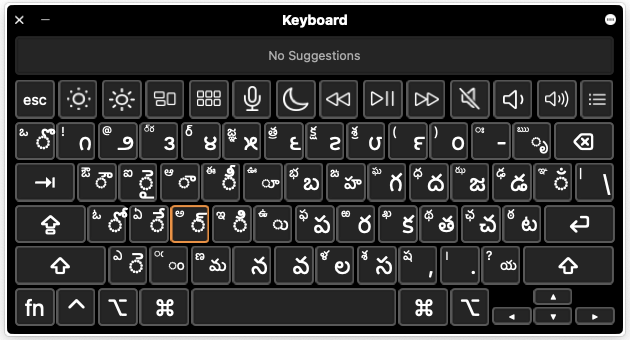
Choose Telugu > Telugu – Standard
The Telugu keyboard will look like this:
Thai
Choose Thai > Thai

The Thai keyboard will look like this:

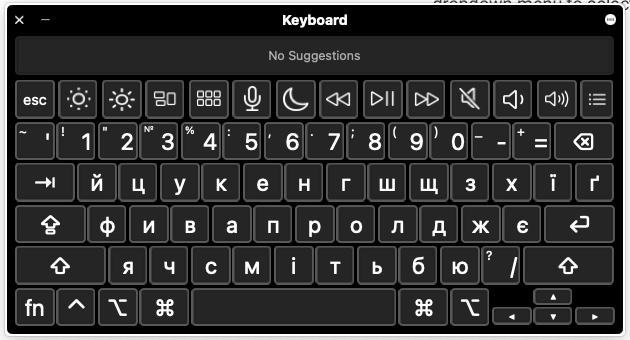
Ukrainian
Choose Ukrainian > Ukrainian – Legacy
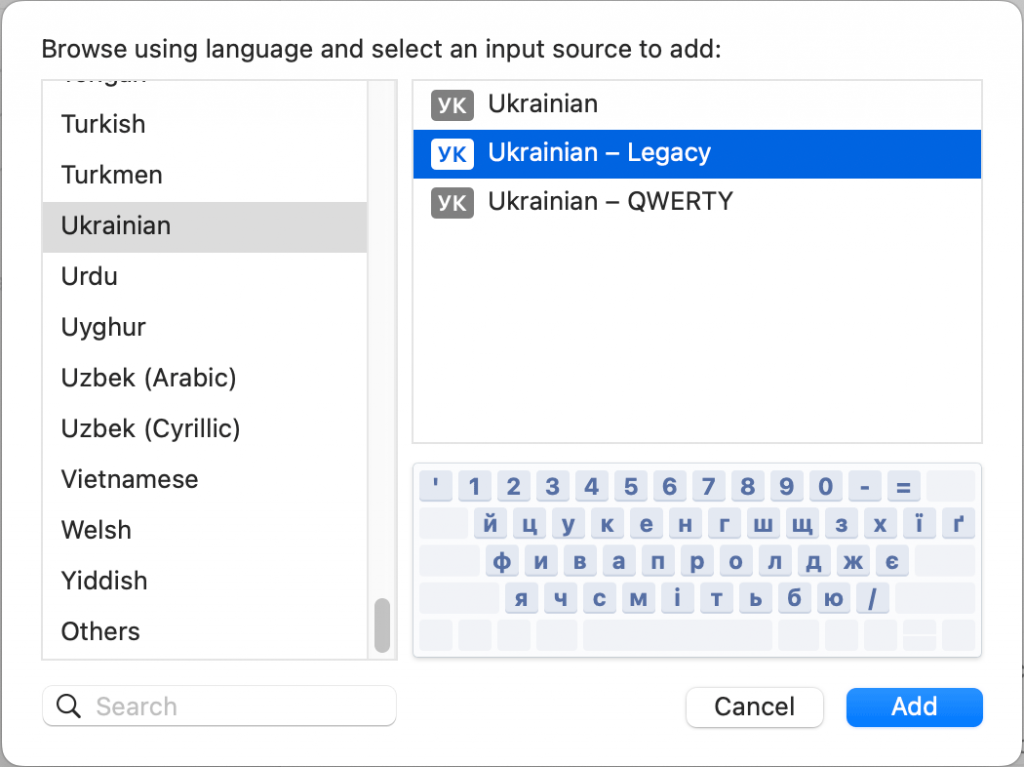
The Ukrainian keyboard will look like this:
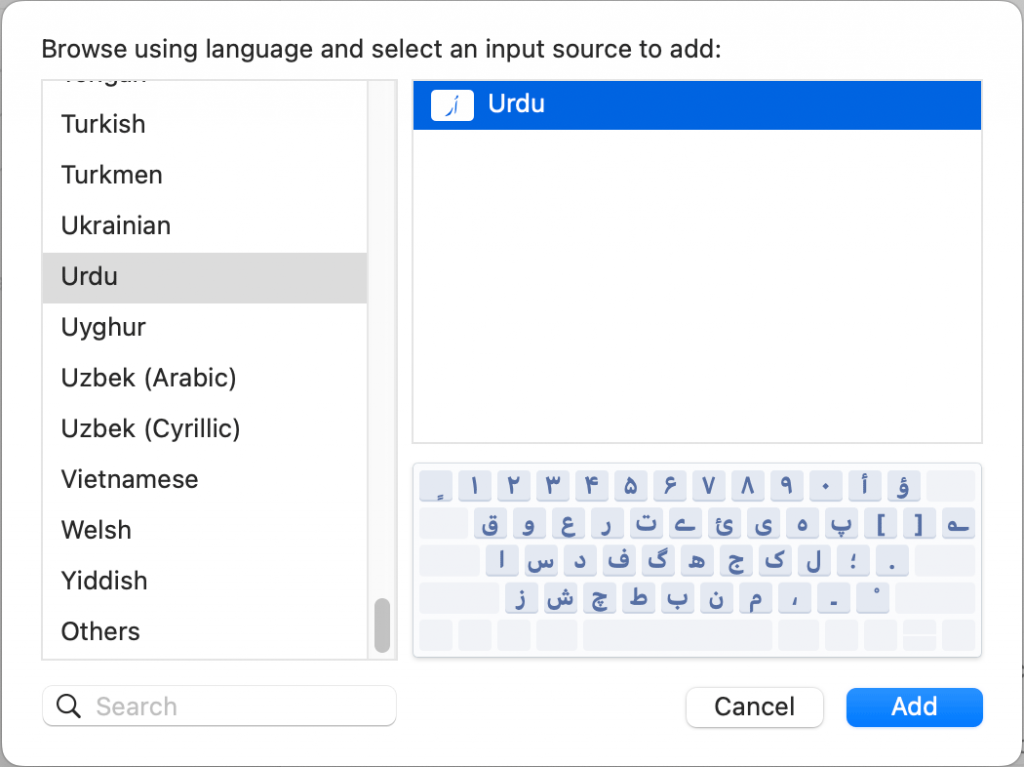
Urdu
Choose Urdu > Urdu
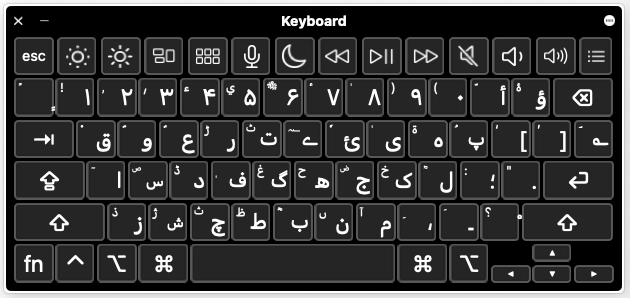
The Urdu keyboard will look like this:
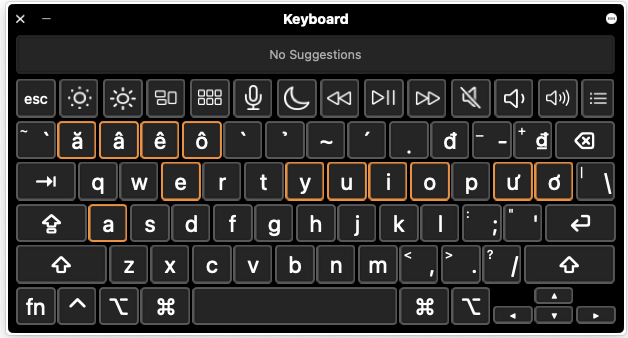
Vietnamese
Choose Vietnamese > Vietnamese
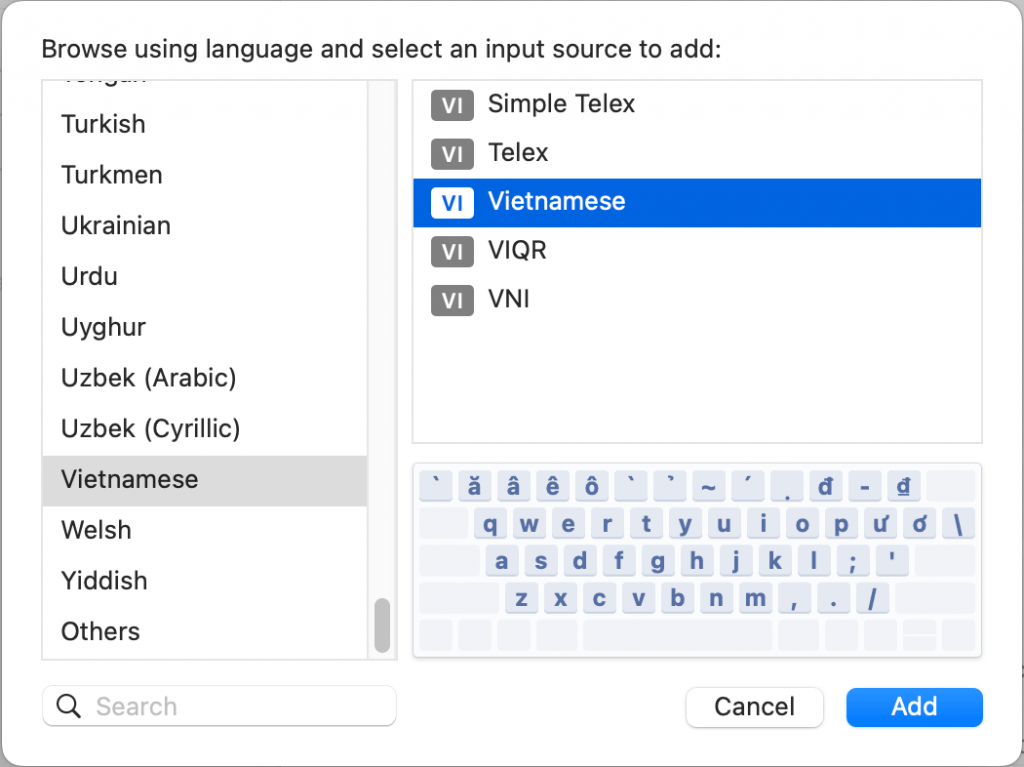
The Vietnamese keyboard will look like this: