USB headsets with microphones are recommended for most Avant language assessments. Other options may require more preparation by IT representatives.

Headsets Preparation
Before testing, an IT representative should configure the headsets for each computer, which may be as simple as plugging in the USB headset.
Use the Avant Technology Check to verify your headset works correctly.
The Testing Coordinator should ensure headsets are plugged in before the test, and that test takers know how to use the headset’s in-line controls (if available).

Adjusting Microphone Levels for MacOS and Windows
If you are receiving a low mic or low volume error message while recording in the Speaking section you may need to adjust the sound settings in your preferences.
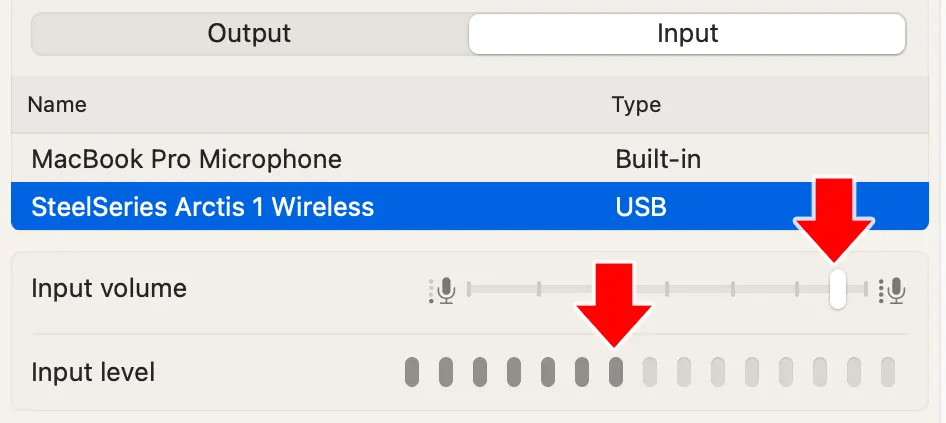
Mac Microphone Setup
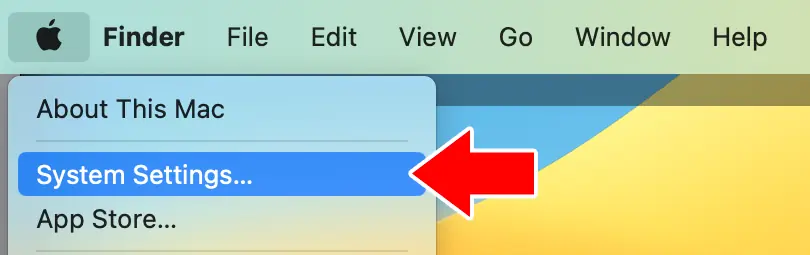
- Open your “System Settings“. (Click the Apple icon and choose “System Settings…”)
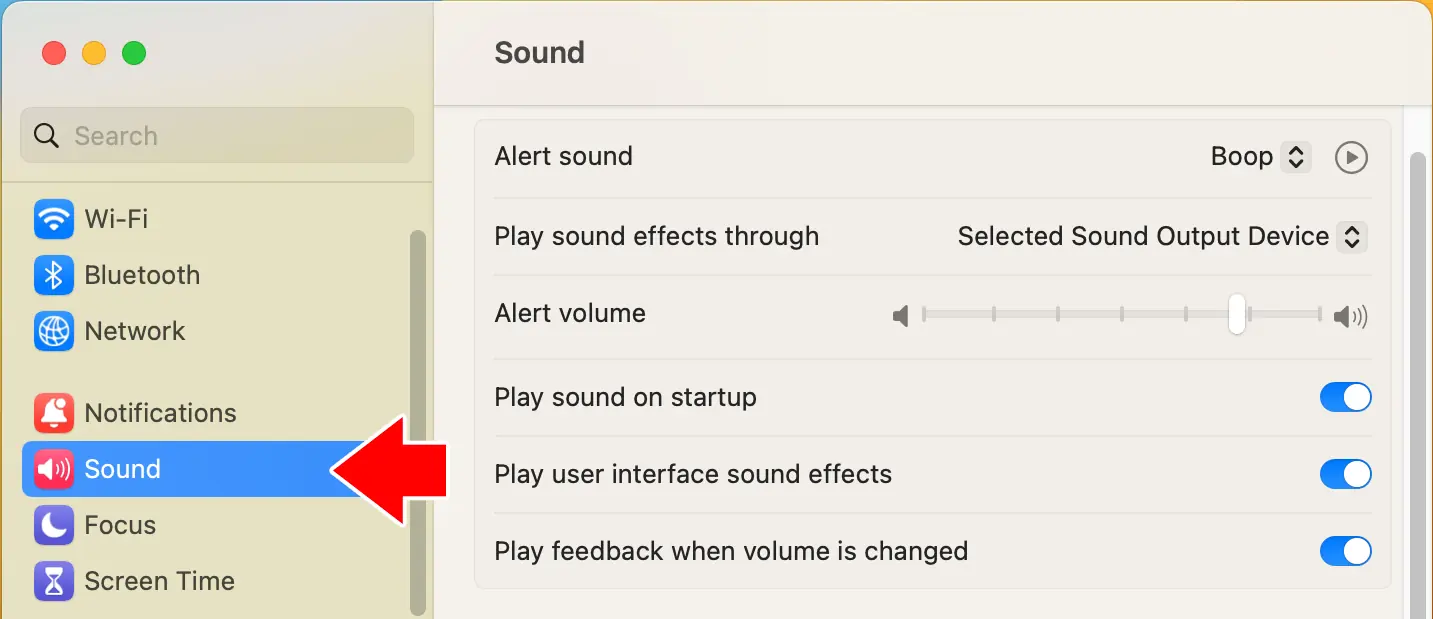
- Click “Sound” in the left menu
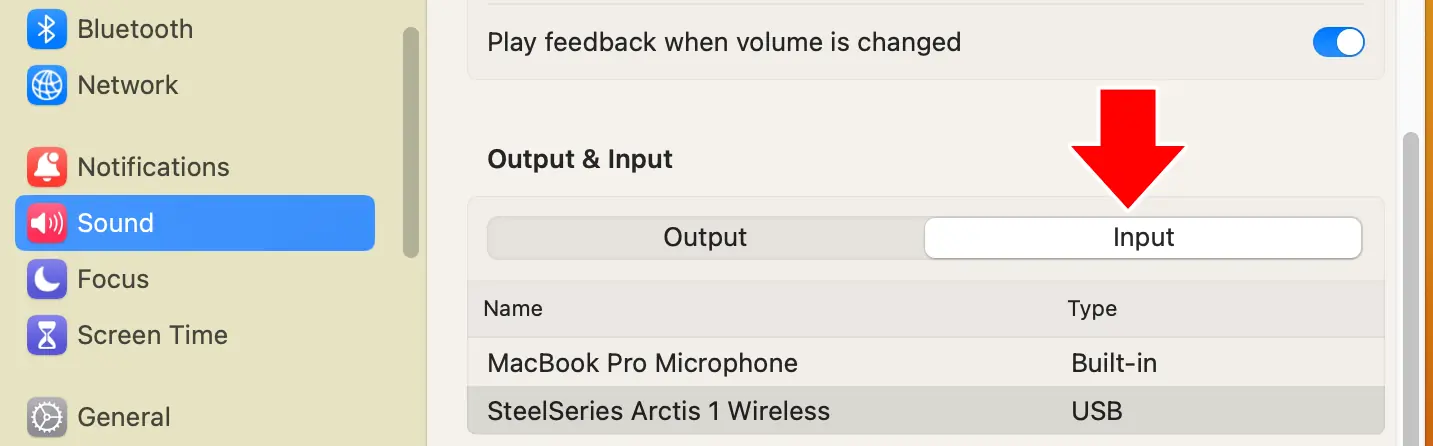
- Click “Input” under “Output & Input”
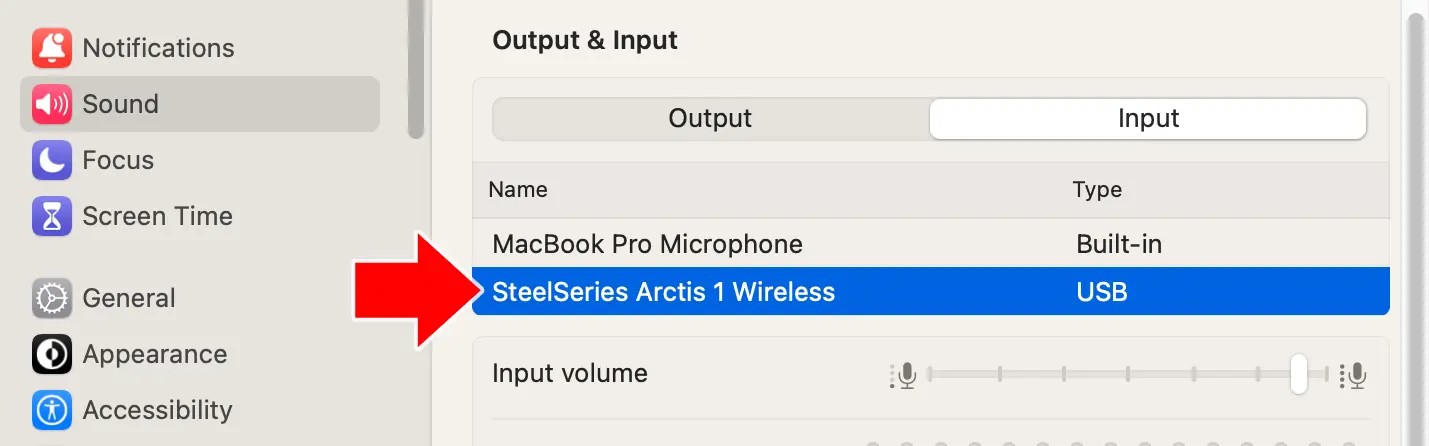
- Click the attached headset to ensure it is the active input device (using the Internal Microphone is not recommended in a lab setting).
- Adjust the “Input Volume” slider until the input level shows movement during normal speaking with the microphone at an appropriate distance from the speaker.
Windows Microphone Setup
1. Right-click the Audio icon (in the bottom-right of your screen) and choose “Open Sound Settings” from the context menu.

2. Click the “Choose your input device” dropdown, under “Input”. Choose your desired headset.

3. Click “Device Properties” below the input device dropdown.

4. Click “Start Test” to test your microphone levels. Adjust the slider as needed.

Adjusting Microphone Levels in Chrome OS
Unfortunately, it is not possible to adjust the microphone sensitivity in ChromeOS. For issues with recording in ChromeOS, we recommend trying an alternate headset, asking the test taker to speak with additional volume, or to move closely to the microphone. If recording issues persist, moving the tester to an area without background noise may be needed.
Troubleshooting
- Ensure the headset is plugged in.
- Check that the microphone is not muted – many headsets have a mute button on the set itself, or on the wire that is connected to it.
- Check that the volume on the microphone is not turned all the way down.
- Make sure the test taker is using a supported browser (Microsoft Edge, Chrome, Safari).
- Try refreshing the page.
- Stop the test and close the browser window, then restart the browser and log back in.
- Try a different browser.
- Try unplugging the headset and plugging it back in during the test (for USB headsets).
- Ensure that “Allow” is selected in the browser site settings allowing the use of the microphone in the test.
- Check to see if you can record sound in a different application on the computer.
- If only one or two test takers are affected, try a different headset or a different computer.
- If students log into student accounts on the computers, make sure that the student account for logging into the computer does not have restrictions that would affect recording.
If You Can’t Hear Audio
If you cannot hear test audio at all, start with the checks below.
1. Play Test Sound
Play this short sound file to test audio. If you do not hear anything continue reading.
2. Check Physical Connection and Mute Buttons
- Make sure the headset is plugged in securely.
- Unplug and re-plug the headset once.
- Check for mute switches or buttons on the headset or cable.
- Turn up volume using the headset controls, if available.
3. Ensure Computer has the Correct Headset Selected
Even when a headset is plugged in, your computer may still be attempting to use a different audio device.
Mac OS
1. Open System Settings → Sound
2. Select the headset under Output

3. Confirm the output volume is not muted
Windows
1. Open Sound Settings
2. Under Output, select your headset.
3. Play a sound and confirm audio comes through the headset
Chromebook
- Open the system tray
- Select Audio settings
- Choose the headset as the output device
If Microphone Isn’t Recording
If you can hear audio but spoken responses are not recording, check that the browser isn’t blocking access to the microphone.
Ensure Browser Isn’t Blocking Microphone
Browsers need to ask permission for a website to use your microphone (as shown in the screenshot below). Users should click “Allow”.

How can I tell if my browser is blocking my microphone?
Chrome
In Chrome: Click the icon on the left of the address bar. If the mic icon is turned off (as shown below) turn it on.

Safari
In Safari (iPad or Mac): Click the icon to the left of the address bar. Click “Website settings“.
Set microphone to “Allow” (as shown below).

If the browser isn’t blocking the microphone, but you still can’t record check to make sure your operating system has the headset setup correctly and check physical connection or mute buttons.
If Audio Still Doesn’t Work
If you’ve tried all the steps above:
- Try using another headset.
- Try moving to a different computer.
- Contact your technical support team.
- Contact Avant Support.