Windows 10 – Virtual Keyboard Instructions
There are 3 steps needed to load virtual keyboards and type in the desired language.
Step 1. Activate the Language and Keyboard in the System. This is explained further below for each language.
Step 2. Switch to the Desired Language.
Step 3. Type in the Desired Language.
Step 1. Activate the Language and Keyboard in the System
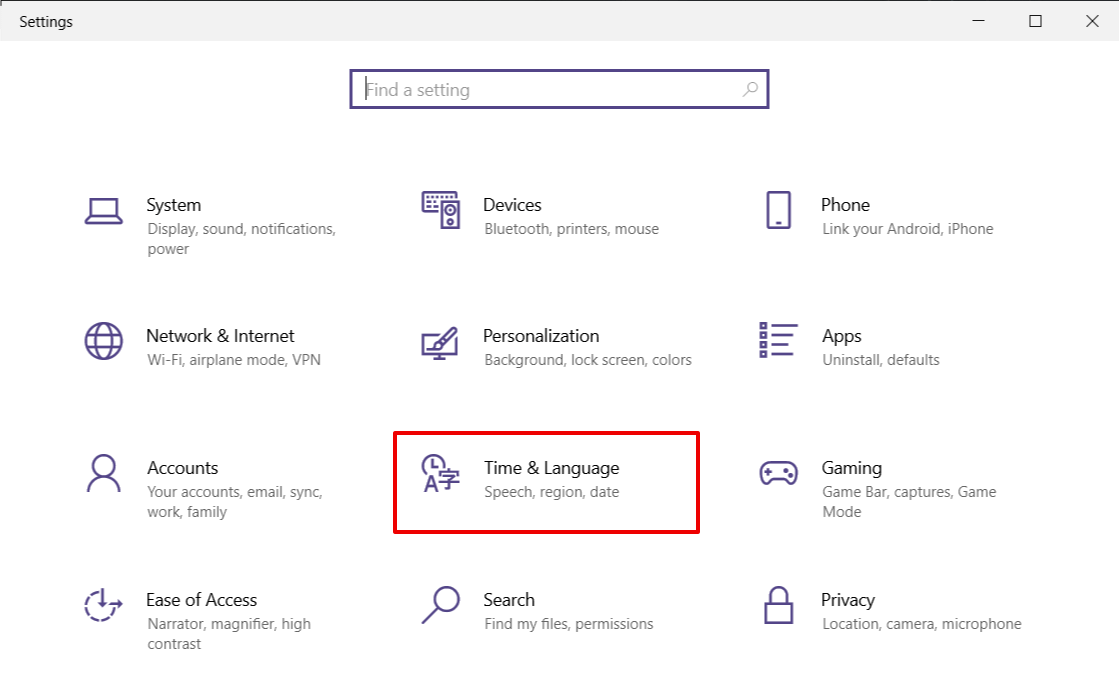
- Start Menu > Settings > Time and Language
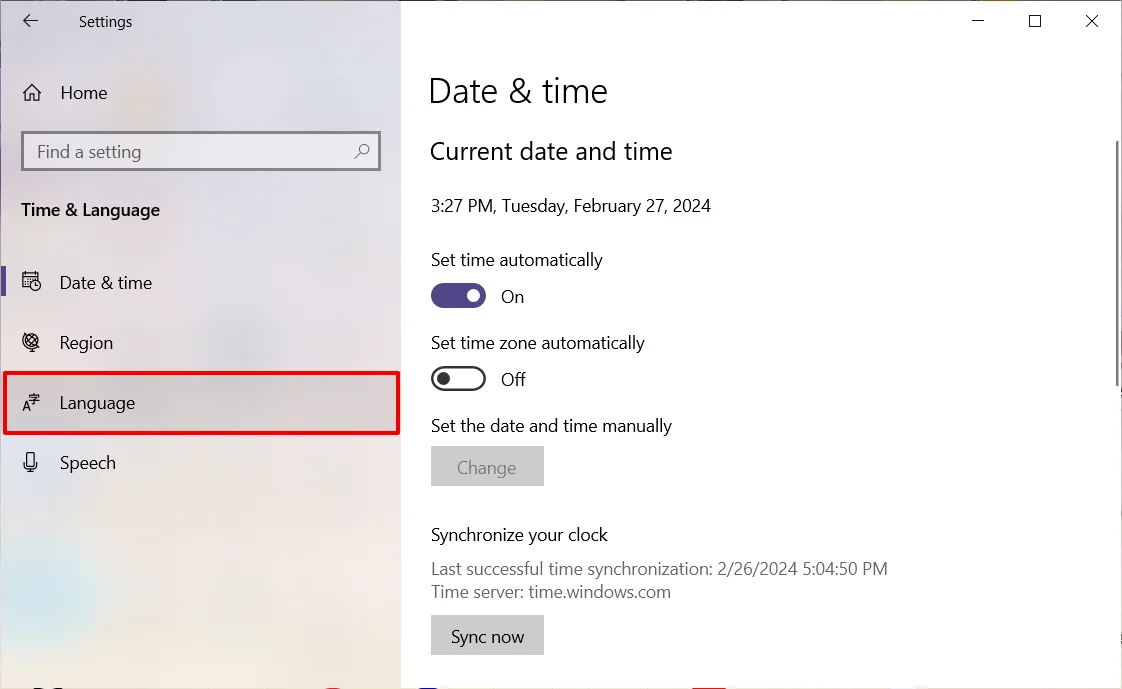
- Select the Region & Language tab.
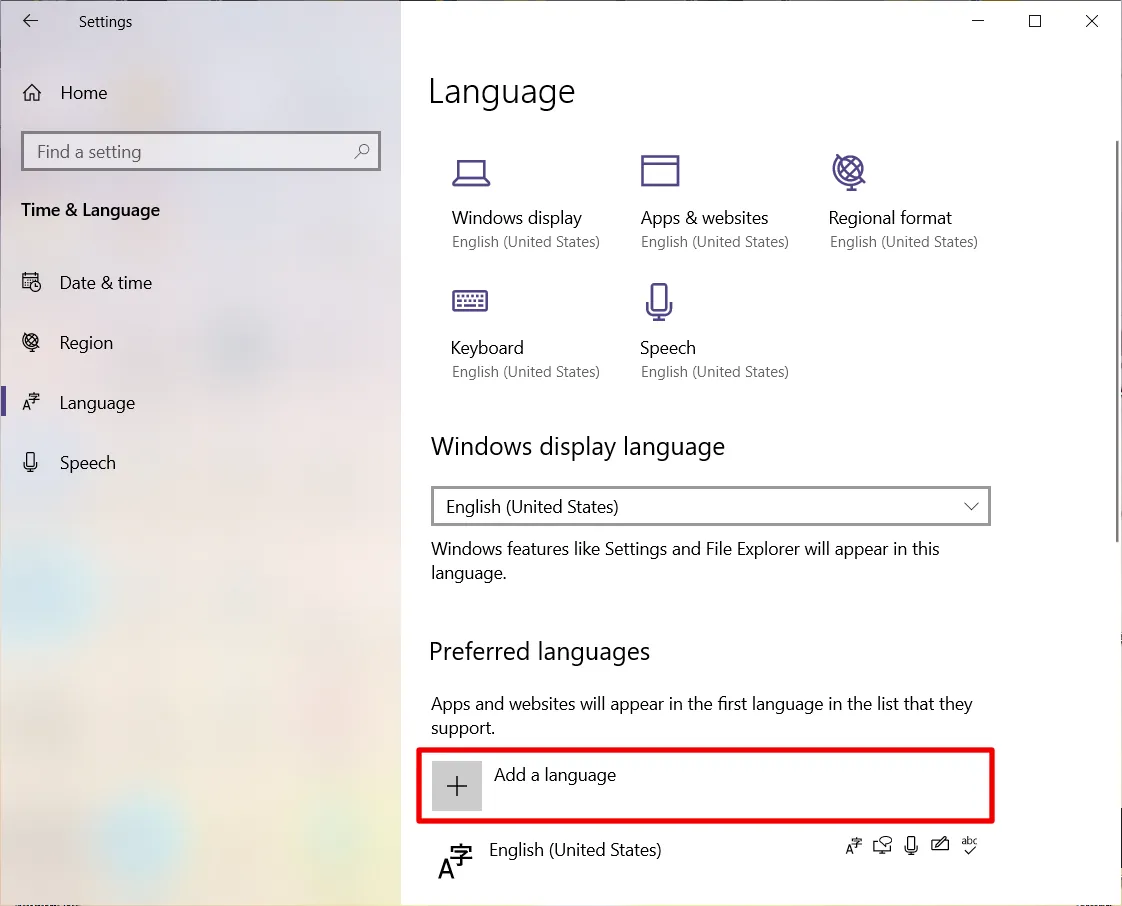
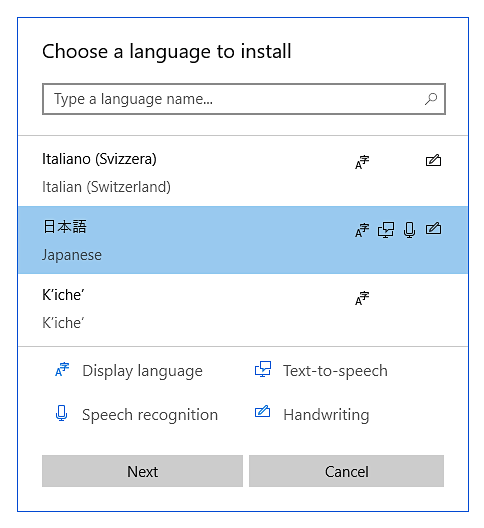
- Click the + sign next to Add a language.
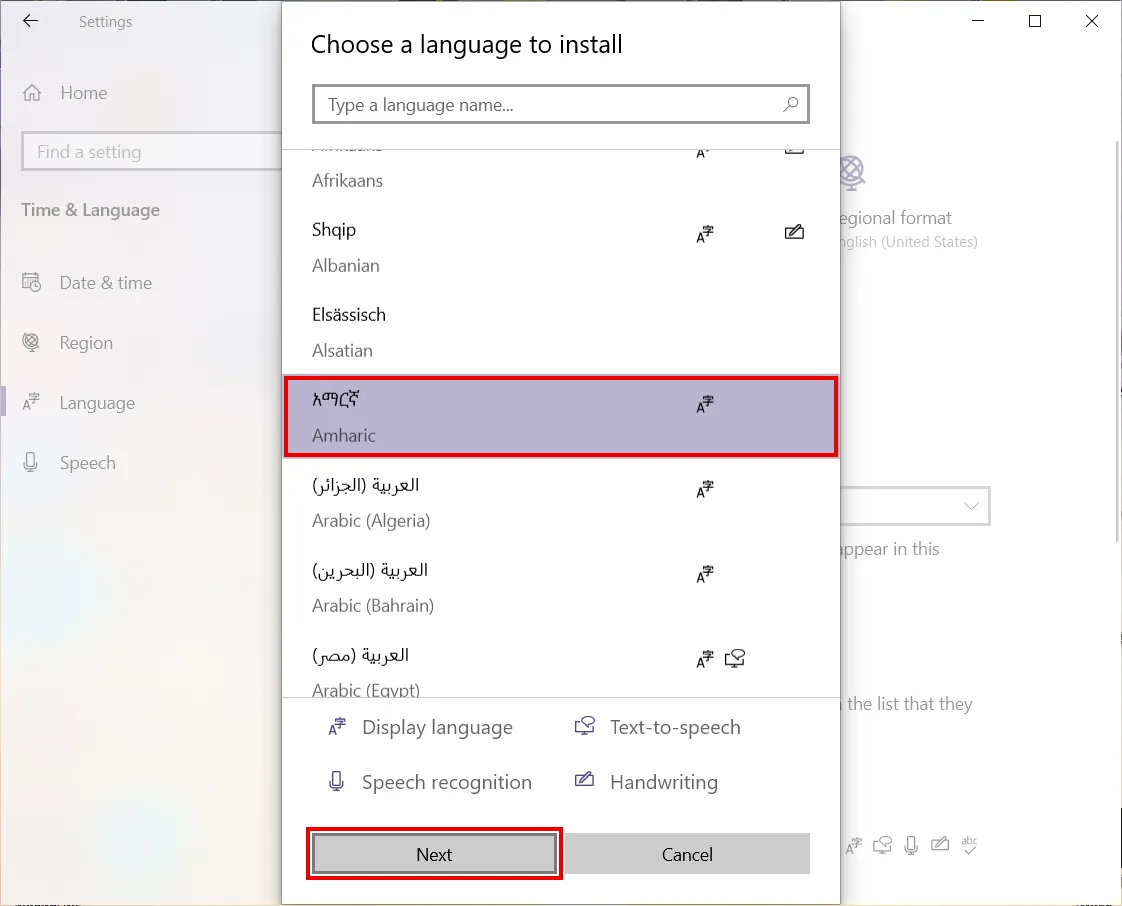
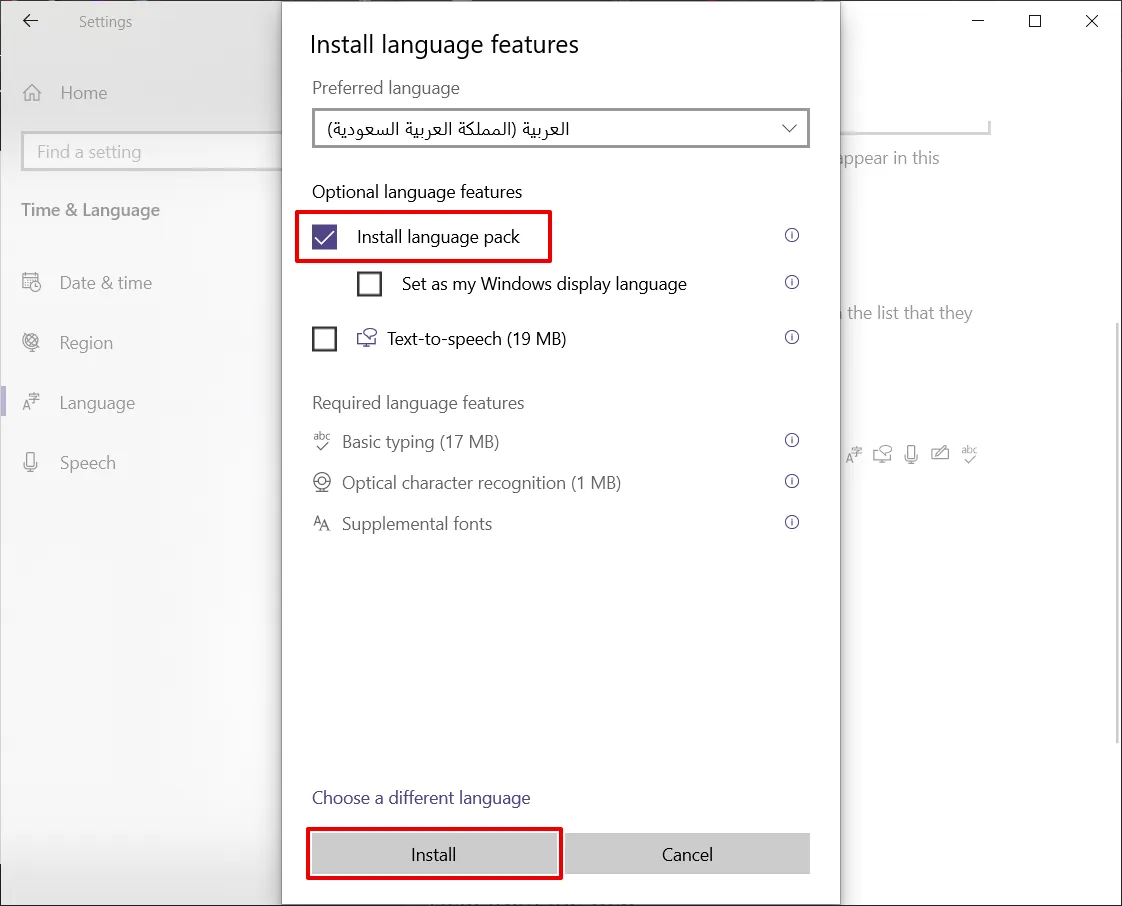
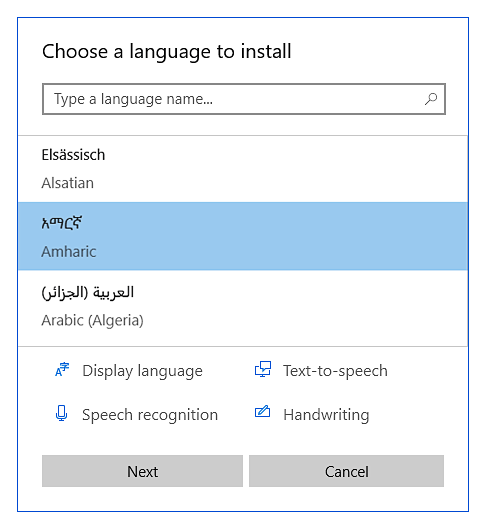
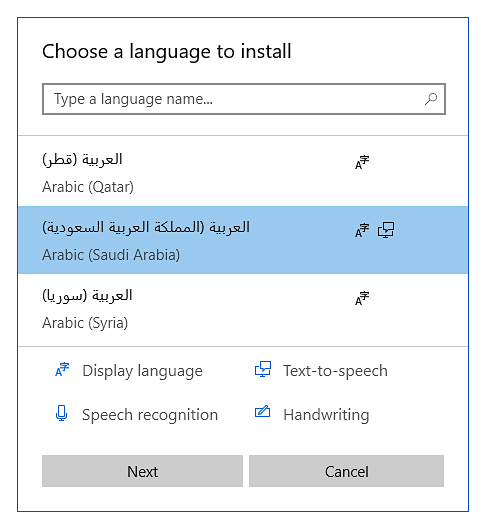
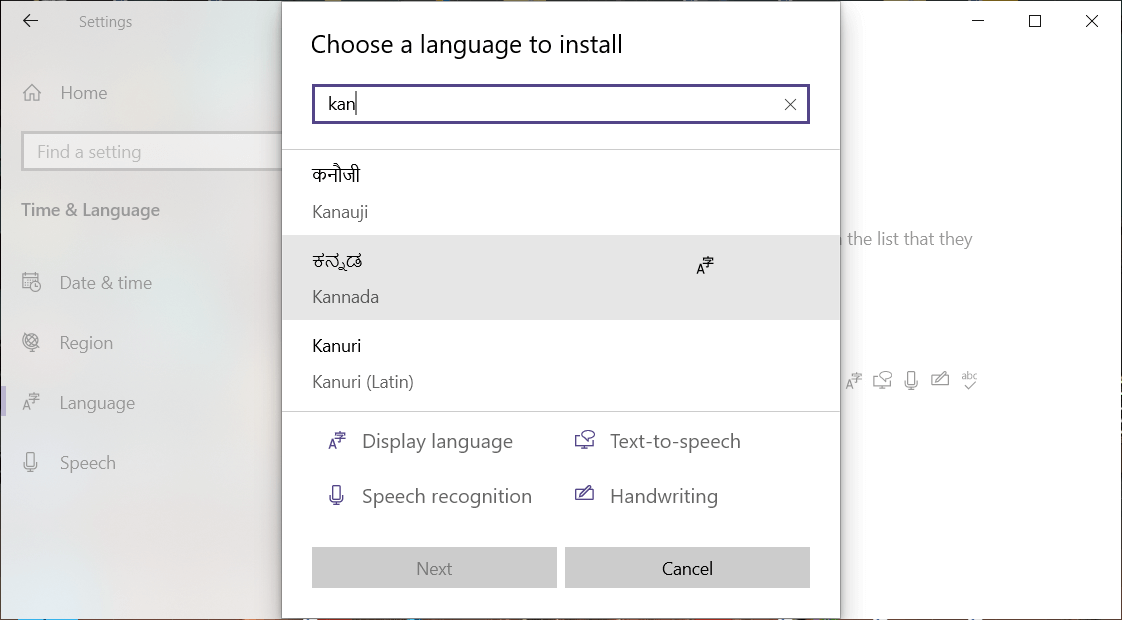
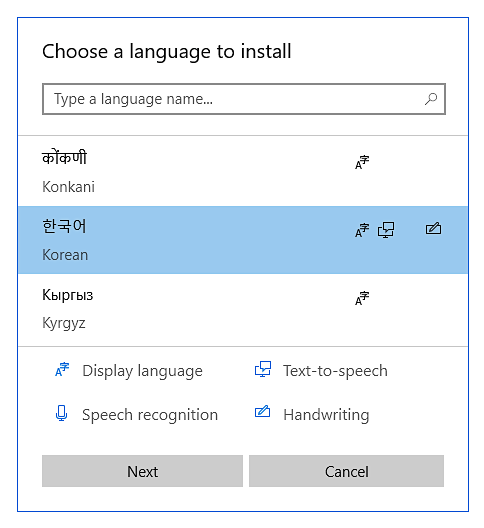
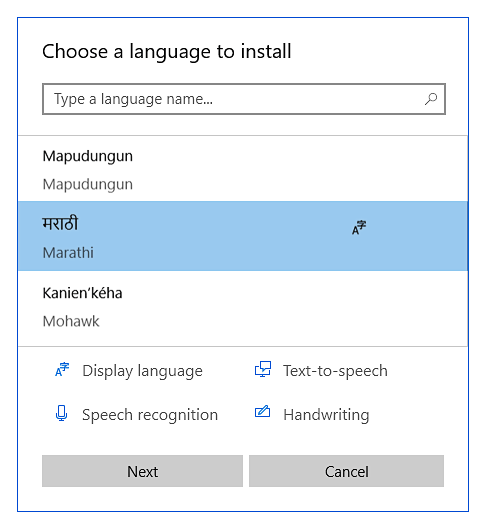
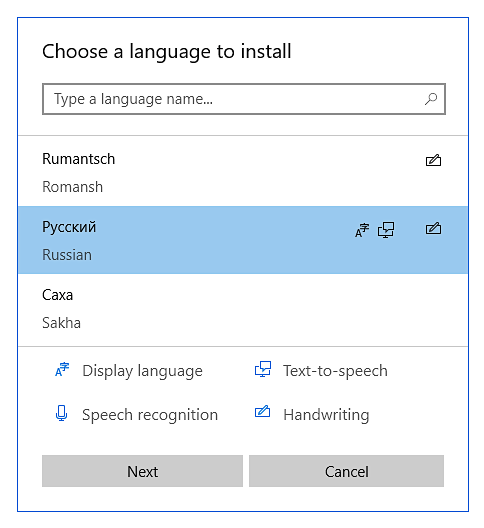
- Select the desired language and click Next. This is explained further below for each language.
- Deselect Set as my Windows display language and click Install.
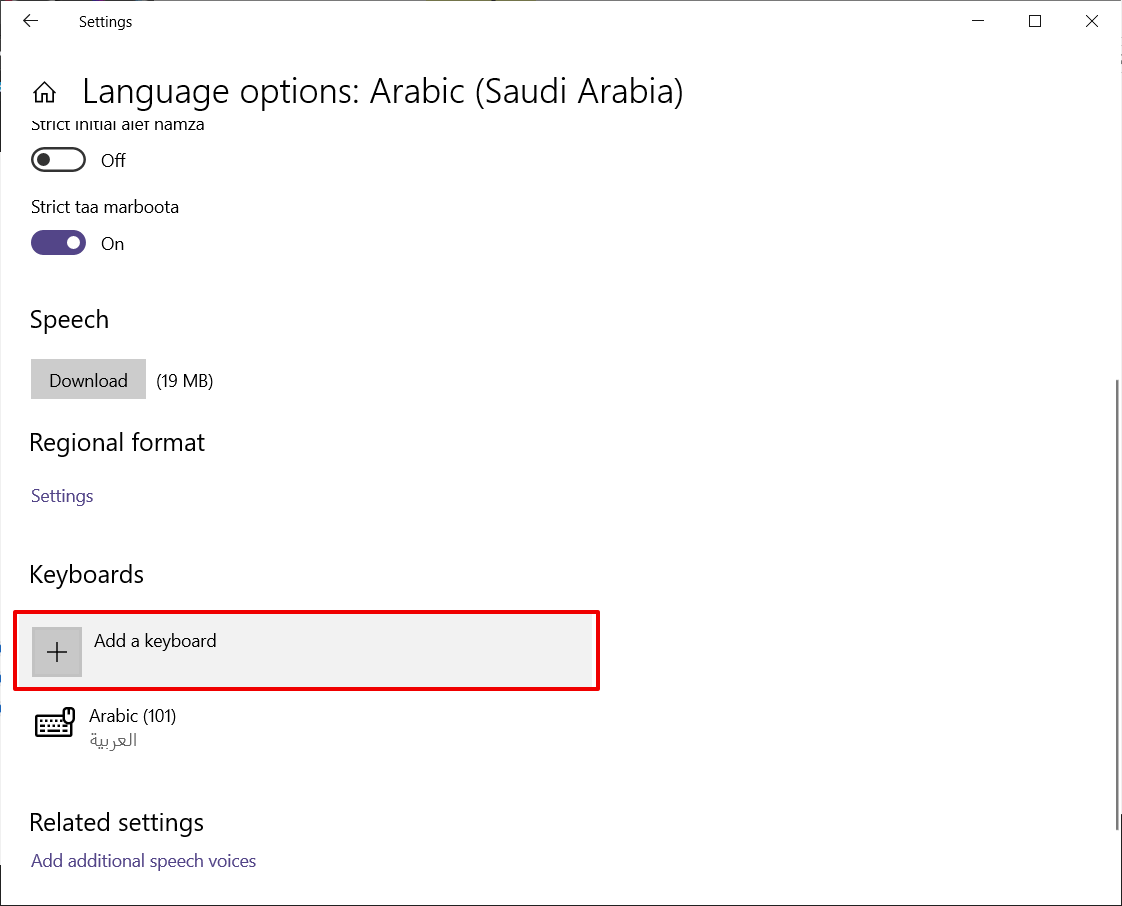
- Click on Options for the language you just added.

- Under Keyboards click the + sign next to Add a keyboard.
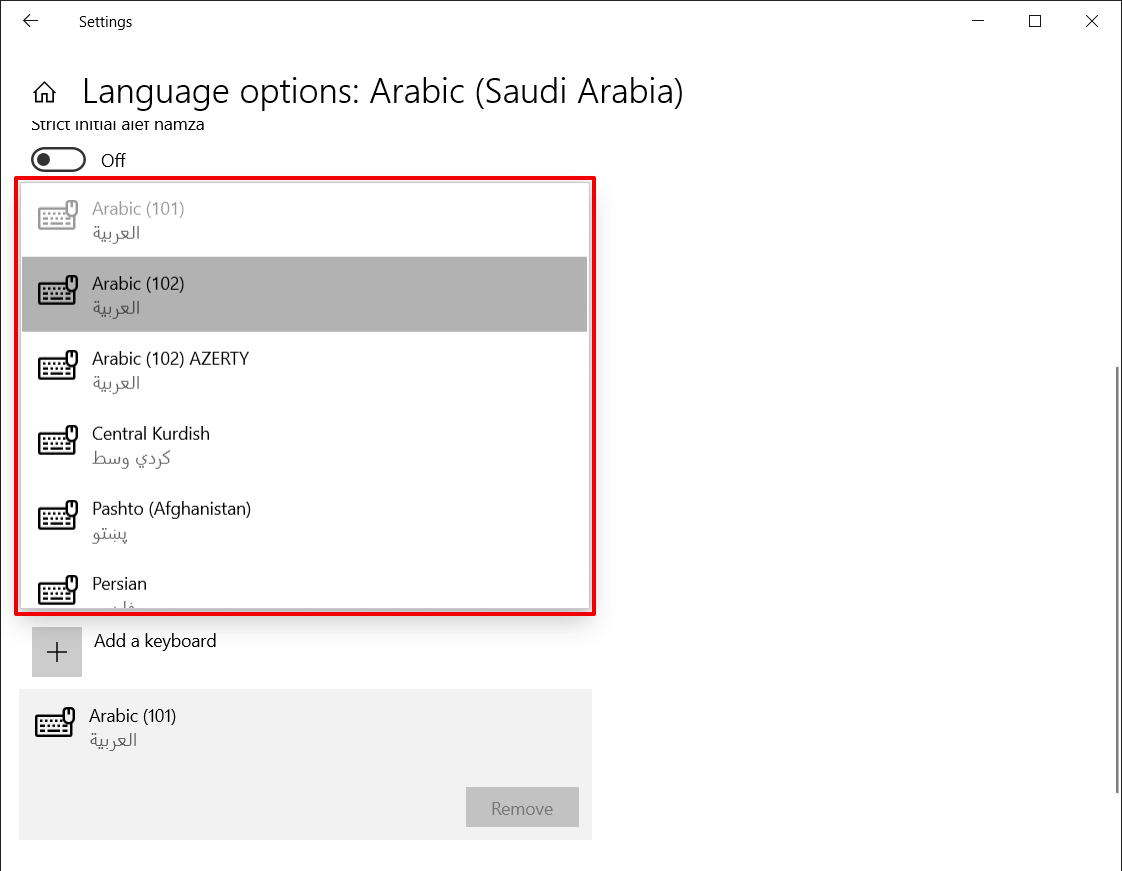
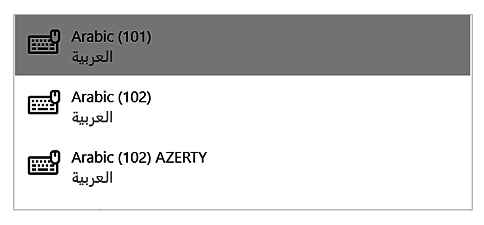
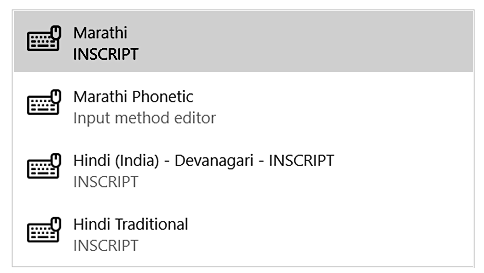
- Click on the desired keyboard to add it. This is explained in further detail below for each language.
- Close the Settings window.
Step 2. Switch to the Desired Keyboard
- Change language keyboards on the taskbar by clicking on the abbreviation for the active language and switching it to the desired language.
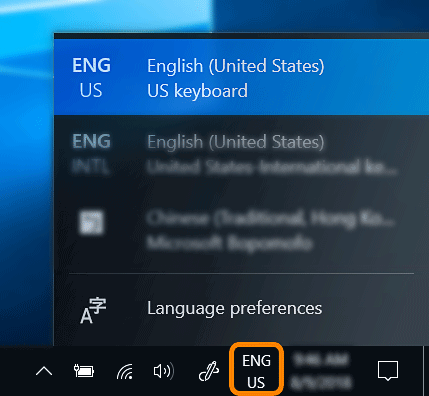
- You can also hold down the Windows key and press the Space Bar to switch language keyboards.
Step 3. Type in the Desired Language
- After switching to the desired keyboard you can begin typing in the desired language.
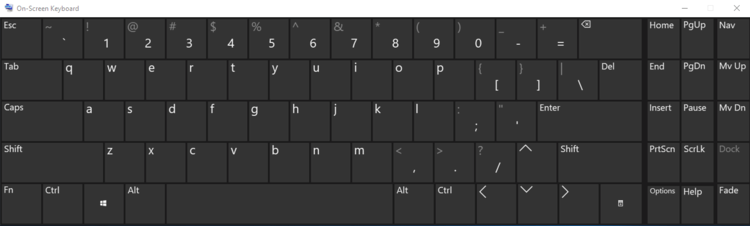
- On-Screen Keyboard: Using the On-Screen Keyboard is not required, but may be helpful for test takers typing in a character-based language. Test takers can click the keys on the On-Screen Keyboard, or use it as a keyboard layout reference when typing on the physical keyboard.
- To turn on the On-Screen Keyboard click on the Windows menu and type “OSK” or “On-Screen Keyboard” and click on the app to launch it. Once the On-Screen Keyboard is turned on it will display the active language.
Language Specific Instructions
Amharic
Windows 10 only provides a phonetic keyboard for Amharic. To type with a keyboard preview we recommend using Google Input Tools with Chrome to type in Amharic on Windows 10 computers.
Read more about using Google Input Tools.
Step 1. Add Amharic as the language then add Amharic Input Method (version 1.0) for the keyboard.

Step 2: Switch the keyboard to Amharic.
Step 3: Type in Amharic (see On-Screen Keyboard instructions).
- Note: There is no keyboard preview for Amharic Input Method (version 1.0) because phrases are spelled out phonetically in Latin characters and will automatically convert to Amharic.
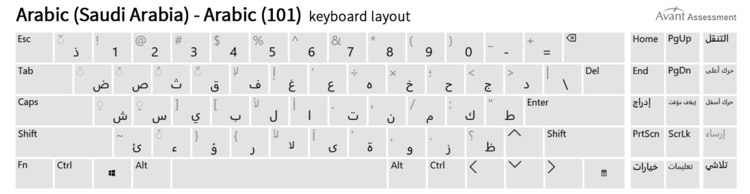
Arabic
Step 1. Add Arabic (Saudi Arabia) as the language then add Arabic (101) for the keyboard.
Step 2. Switch the keyboard to Arabic.
Step 3. Type in Arabic.
- Responses need to be typed in Modern Standard Arabic.
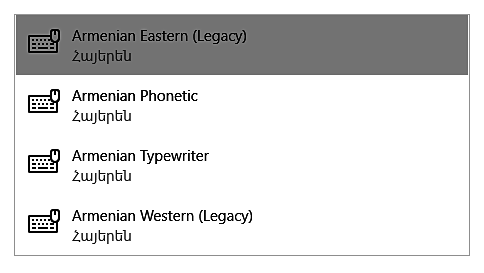
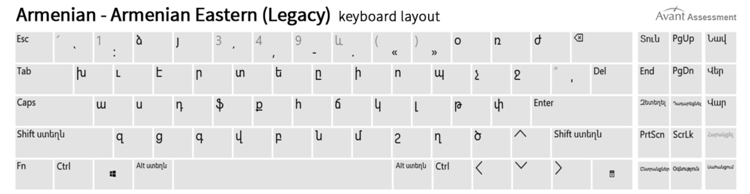
Armenian
Step 1. Add Armenian as the language then add Armenian Eastern (Legacy) for the keyboard.

Step 2. Switch the keyboard to Armenian.
Step 3. Type in Armenian.
- Press Shift for additional Armenian letters on the keyboard.
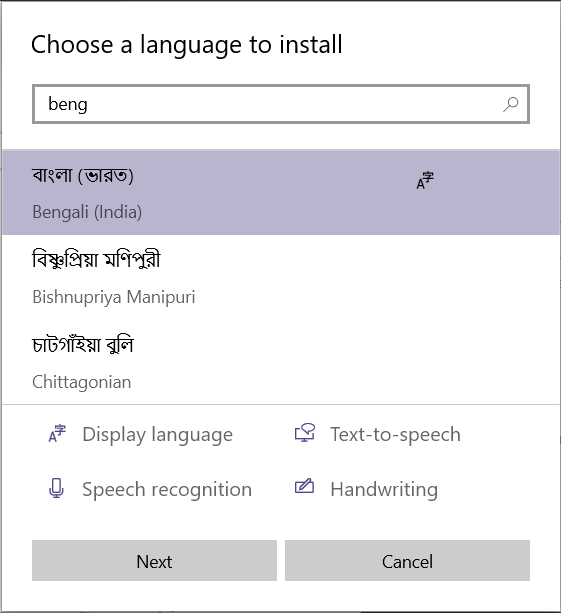
Bengali
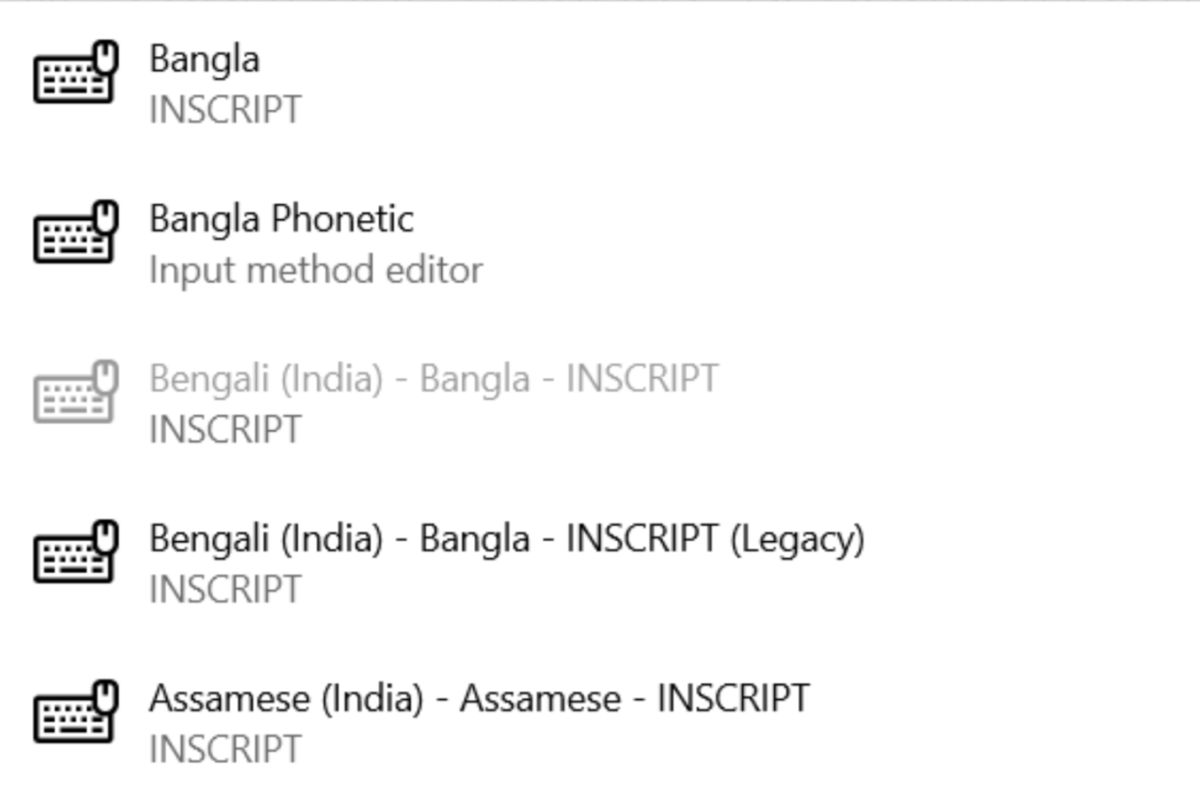
Step 1. Add Bengali (India) as the language then add Bangla INSCRIPT for the keyboard.
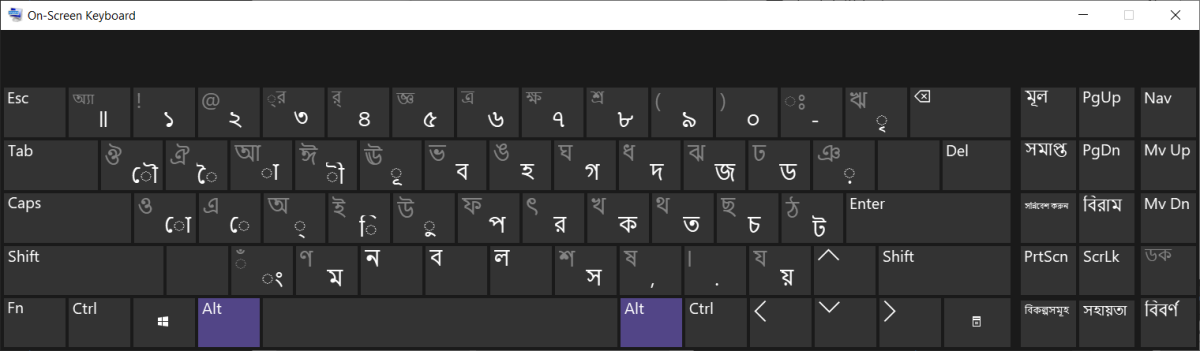
Step 2. Switch the keyboard to Bangla.
Step 3. Type in Bangla.
- Press Shift or Ctrl + Alt to access additional Bangla characters on the keyboard.
Chinese Simplified
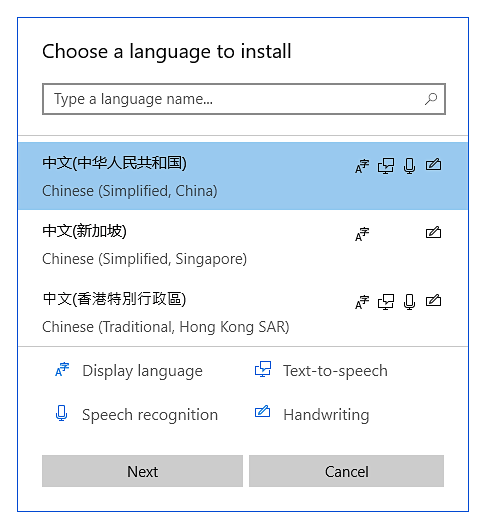
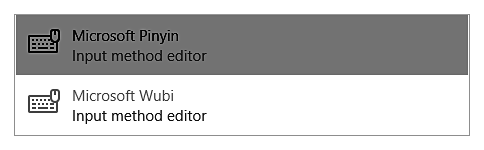
Step 1. Add Chinese (Simplified, China) as the language then add Microsoft Pinyin for the keyboard
Step 2. Switch the keyboard to Chinese Simplified.
- At this point there is also a Chinese/English switch key which defaults to the Shift key. When you go to start typing you may need to hit shift to start typing in Chinese.
Step 3. Type in Chinese Simplified.
- Typing in Chinese Simplified begins with typing the pronunciation of the word (Pinyin) phonetically using Latin characters and a list of matching Chinese Simplified candidates will automatically display and can be selected.
- Note: There is no keyboard preview for Chinese (Simplified, China) – Microsoft Pinyin because phrases are spelled out phonetically in Latin characters and a list of Chinese Simplified candidates will automatically display for selection.
Important: If test takers use Pinyin* in the response (not Chinese characters), they will top out at the Novice-High level. To score at the Intermediate level or higher, test takers MUST show the ability to use characters.
*Pinyin is the Romanization of the Chinese characters based on their pronunciation. In Mandarin Chinese, the phrase “Pin Yin” literally translates into “spell sound”. In other words, spelling out Chinese phrases with letters from the English alphabet.
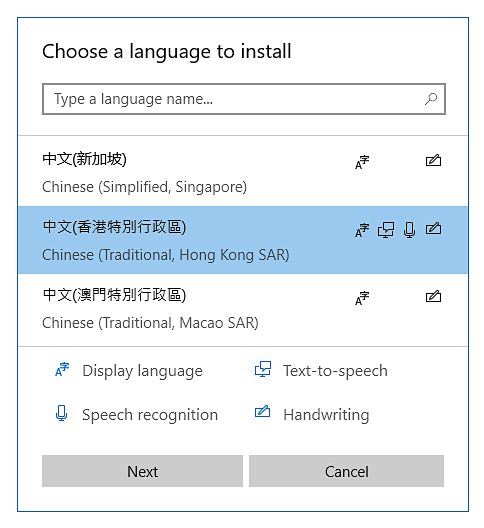
Chinese Traditional
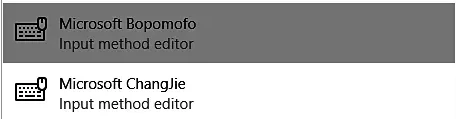
Step 1: Add Chinese (Traditional, Hong Kong SAR) as the language then add Microsoft Bopomofo for the keyboard
Step 2. Switch the keyboard to Chinese Traditional.
- At this point there is also a Chinese/English switch key which defaults to the Shift key. When you go to start typing you may need to hit Shift to start typing in Chinese.
Step 3. Type in Chinese Traditional.
- Typing in Chinese Traditional begins with typing the pronunciation of the word with letters from the English alphabet, and then hitting the space bar to bring up a list of Chinese Traditional characters to choose.
- Note: There is no keyboard layout for for the Chinese (Traditional, Hong Kong SAR) – Microsoft Bopomofo keyboard layout because phrases are spelled out phonetically in Latin characters and a list of Chinese Traditional candidates will automatically display for selection.
Important: If test takers use Pinyin* in the response (not Chinese characters), they will top out at the Novice-High level. To score at the Intermediate level or higher, test takers MUST show the ability to use characters.
*Pinyin is the Romanization of the Chinese characters based on their pronunciation. In Mandarin Chinese, the phrase “Pin Yin” literally translates into “spell sound”. In other words, spelling out Chinese phrases with letters from the English alphabet.
Greek
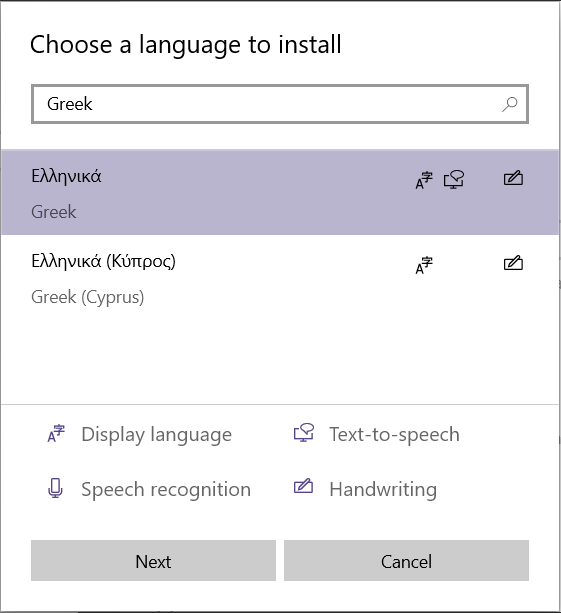
Step 1: Choose Greek as the language.
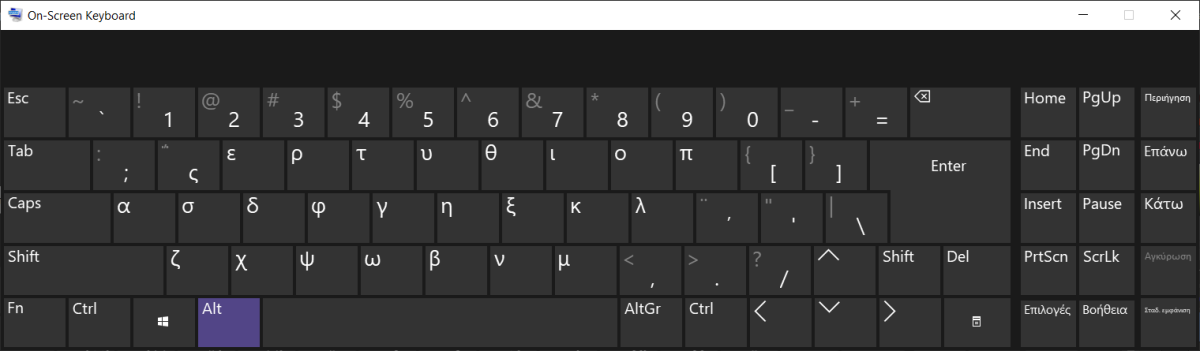
Step 2. Switch the keyboard to Greek.
Step 3. Type in Greek.
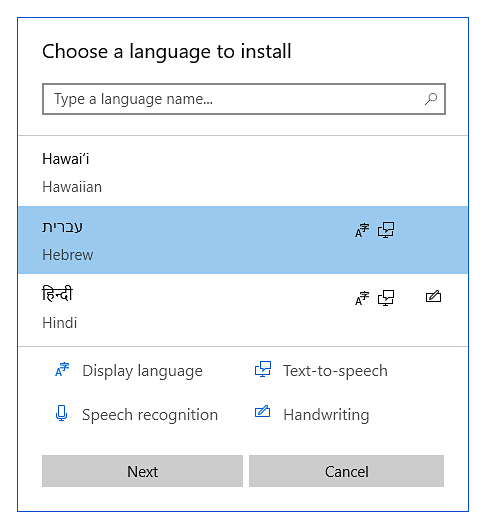
Hebrew
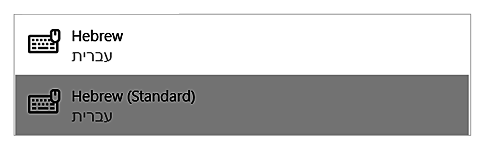
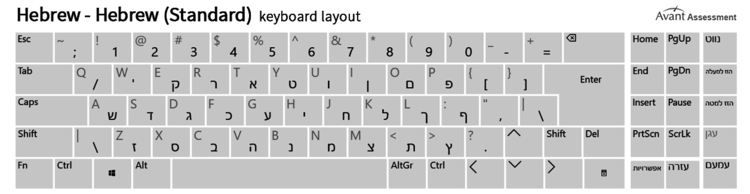
Step 1. Add Hebrew as the language then add Hebrew (Standard) for the keyboard.
Step 2. Switch the keyboard to Hebrew.
Step 3. Type in Hebrew.
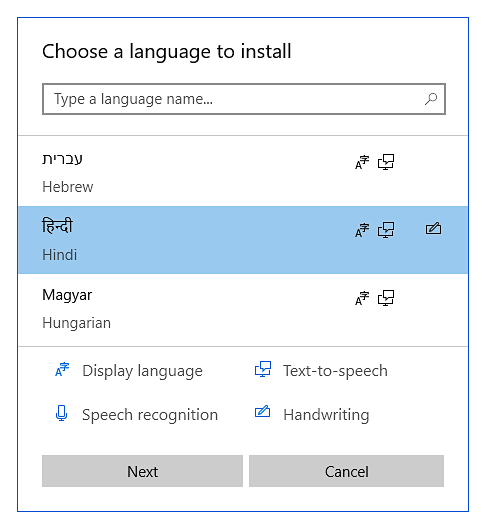
Hindi
Step 1. Add Hindi as the language then add Hindi Traditional INSCRIPT for the keyboard.
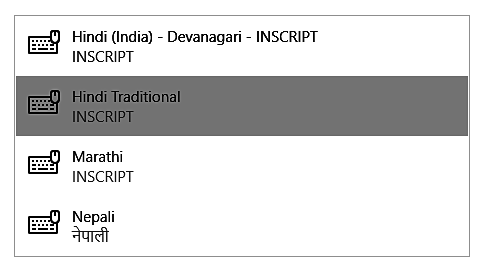
Step 2. Switch the keyboard to Hindi.
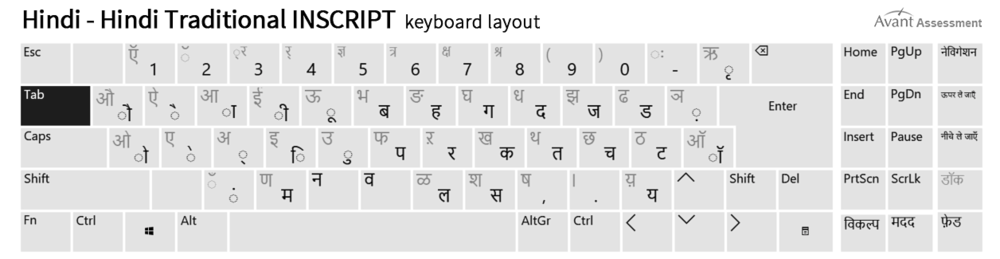
Step 3. Type in Hindi.
- Press Shift or Ctrl + Alt to access additional Hindi characters on the keyboard.
Japanese
Step 1. Add Japanese as the language then add Microsoft IME for the keyboard.

Step 2. Switch the keyboard to Japanese.
- There is a Japanese/English toggle switch next to where you switched the language on the taskbar. When you go to start typing you may need to click on it to start typing in Japanese.
- Mode [A] is used to type the English alphabet.
- Mode [あ] is used to type Japanese Hiragana input mode by using Romaji typing method.
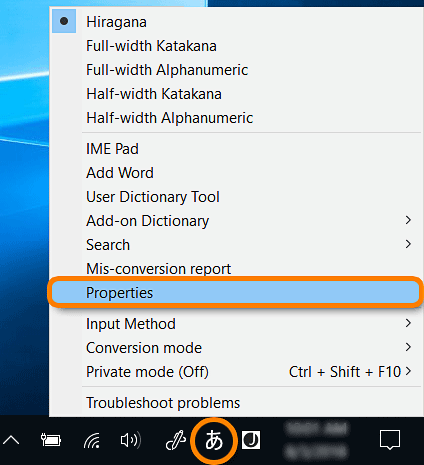
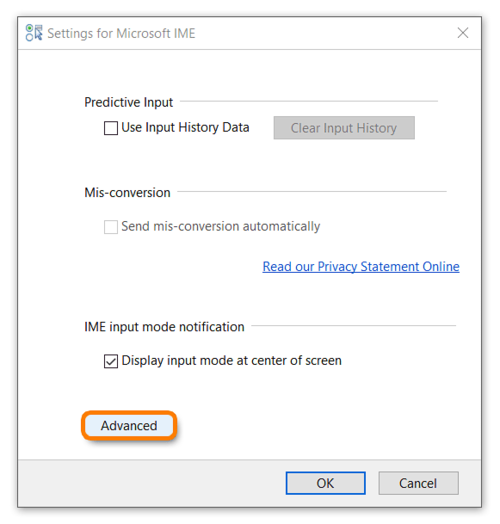
- There are advanced options available that can be accessed by right-clicking on the Japanese/English toggle. Click on Properties to access the advanced options and customize the way the keyboard will be used and also to change the input mode.
Step 3. Type in Japanese.
- Typing in Japanese begins with typing the pronunciation of the word phonetically using Latin characters and will automatically appear on the screen in Hiragana. The word should also be underlined at this point.
- You can convert Romaji into Kana or Kanji with the Space Bar while the word is underlined. If the word (phrase) you want to type is listed, select it with the Up/Down keys or use the Space Bar to go down.
- The Enter key will make the underline disappear and enter the Japanese characters displayed.
- Note: There is no keyboard preview for Japanese – Microsoft IME because phrases are spelled out phonetically with Latin characters.
Important: If test takers use Romaji* (not changing that to Hiragana, Katakana, or Kanji), they will top out at the Novice-High level. To score at the Intermediate level or higher, test takers MUST show the ability to use characters.
* Romaji is the Romanization of the Japanese characters based on their pronunciation. In Japanese, the phrase “Romaji” literally translates into “roman letters”. In other words, spelling out Japanese phrases with letters from the English alphabet.
Kannada
Step 1. Add Kannada as the language then add Kannada INSCRIPT for the keyboard.

Step 2. Switch the keyboard to Kannada.
Step 3. Type in Kannada.
- Press Shift or Ctrl + Alt to access additional Kannada characters on the keyboard.

Khmer
Step 1. Add Khmer as the language.

Step 2. Switch the keyboard to Khmer.
Step 3. Type in Khmer.

Korean
Step 1. Add Korean as the language then add Microsoft IME for the keyboard.

Step 2. Switch the keyboard to Korean.
- There is a Korean/English toggle switch next to where you switched the language on the taskbar. When you go to start typing you may need to click on it to start typing in Korean.
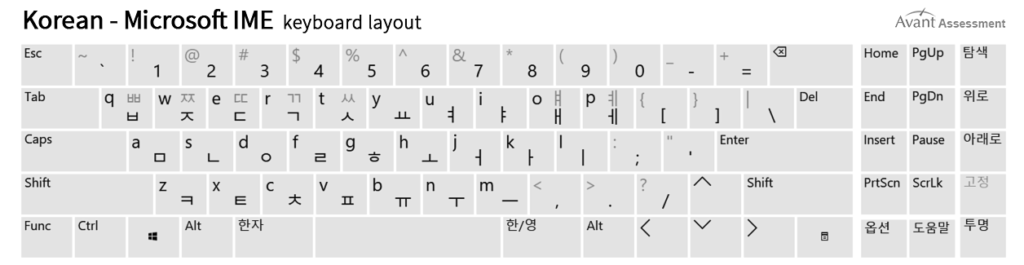
Step 3. Type in Korean.
- Press Shift to access additional Korean characters on the keyboard
Marathi
Step 1. Add Marathi as the language then add Marathi INSCRIPT for the keyboard.
Step 2. Switch the keyboard to Marathi.
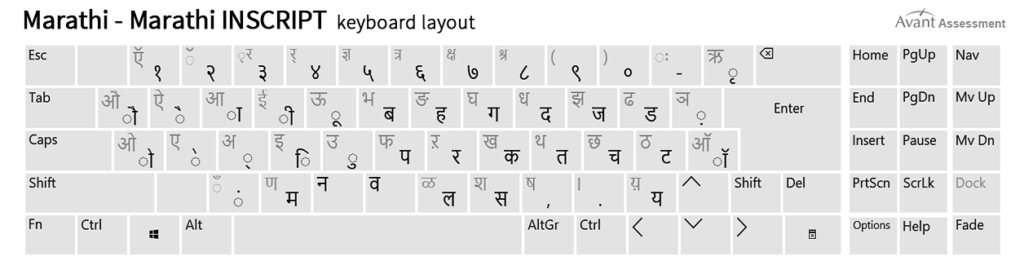
Step 3. Type in Marathi.
- Press Shift to access additional Marathi characters on the keyboard.
Nepali
Step 1. Add Nepali (Nepal) as the language.

Step 2. Switch the keyboard to Nepali (Nepal).
Step 3. Type in Nepali.

Pashto
Step 1. Add Pashto language.

Step 2. Switch the keyboard to Pashto.
Step 3. Type in Pashto.

Persian-Farsi
Step 1: Choose Persian as the language.

Step 2. Switch the keyboard to Persian.
Step 3. Type in Persian.

Punjabi
Step 1: Choose Punjabi as the language.

Step 2. Switch the keyboard to Punjabi.
Step 3. Type in Punjabi.

Russian
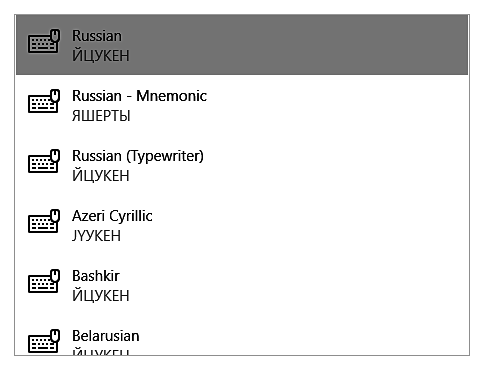
Step 1. Add Russian as the language then add Russian for the keyboard.
Step 2. Switch the keyboard to Russian.
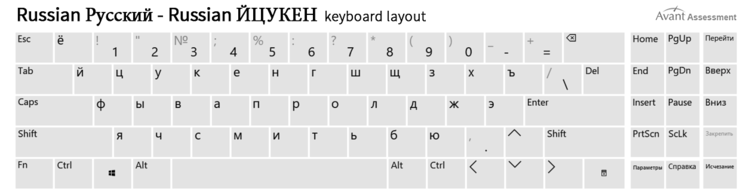
Step 3. Type in Russian.
- Press Shift to access additional Russian characters on the keyboard.
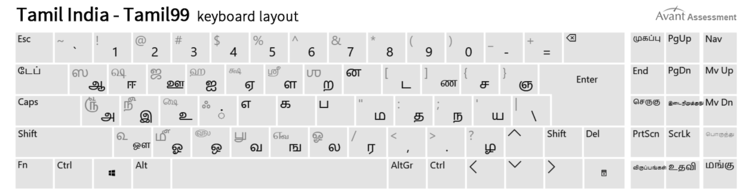
Tamil
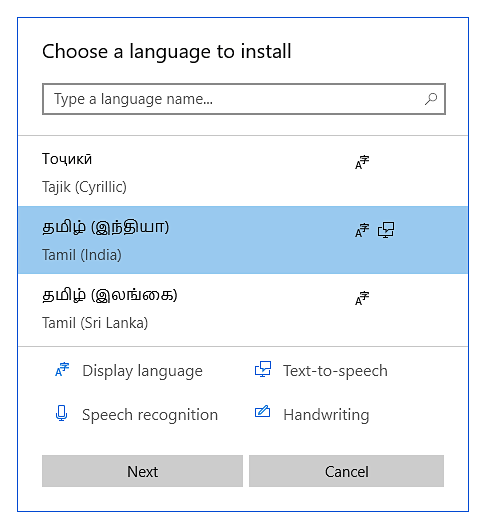
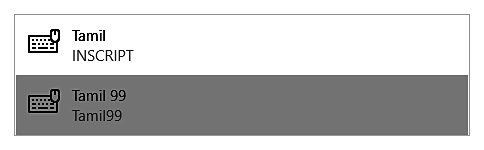
Step 1. Add Tamil (India) as the language then add Tamil 99 for the keyboard.
Step 2. Switch the keyboard to Tamil.
Step 3. Type in Tamil.
- Press Shift or Ctrl + Alt to access additional Tamil characters on the keyboard.
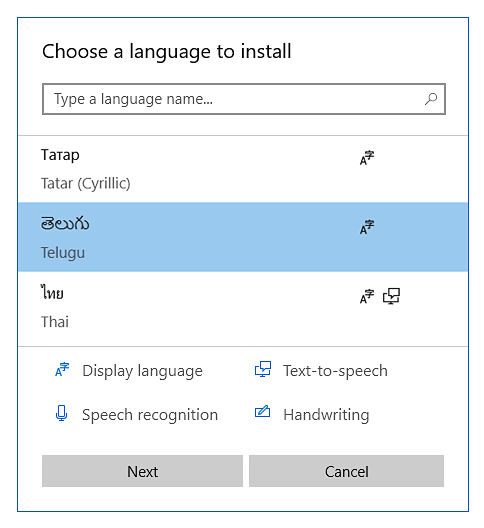
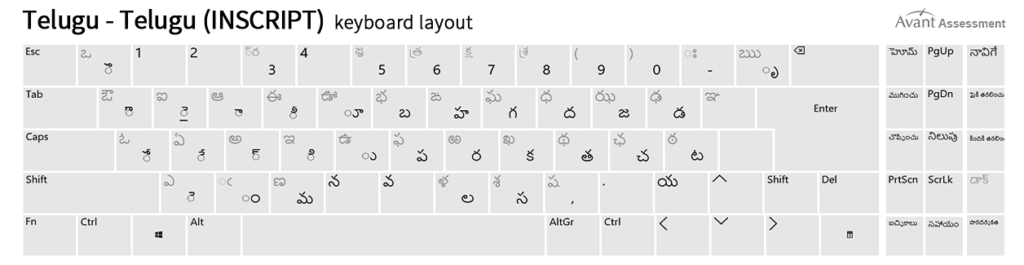
Telugu
Step 1. Add Telugu as the language then add Telugu INSCRIPT for the keyboard.

Step 2. Switch the keyboard to Telugu.
Step 3. Type in Telugu.
- Press Shift or Ctrl + Alt to access additional Telugu characters on the keyboard.
Thai
Step 1. Add Thai as the language.

Step 2. Switch the keyboard to Thai.
Step 3. Type in Thai.

Tigrinya
Step 1. Add Tigrinya as the language.

Step 2. Switch the keyboard to Tigrinya.
Step 3. Type in Tigrinya.
Note: There is no keyboard layout for the Tigrinya because phrases are spelled out phonetically in Latin characters and will automatically convert to Tigrinya.
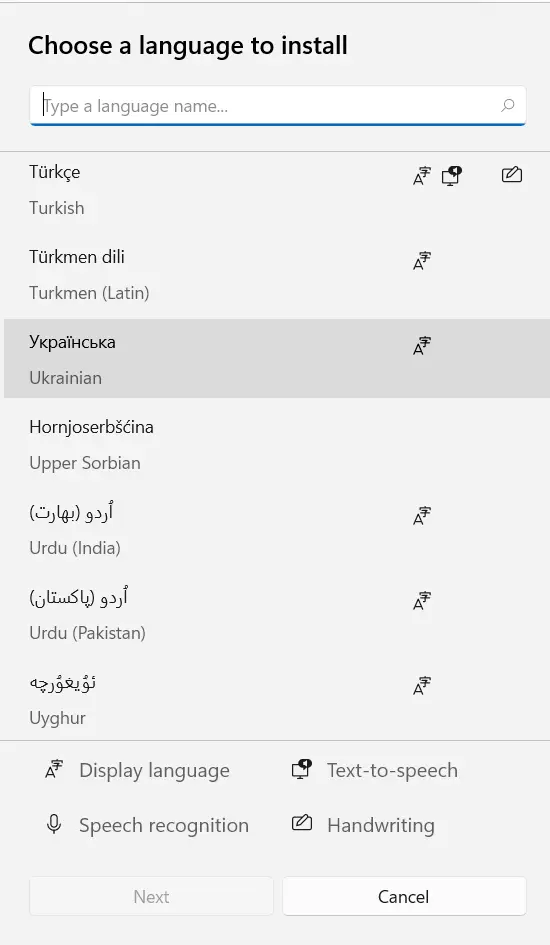
Ukrainian
Step 1. Add Ukrainian as the language then add Ukrainian for the keyboard.

Step 2. Switch the keyboard to Ukrainian.
Step 3. Type in Ukrainian.
- Press Shift to access additional Ukrainian characters on the keyboard.

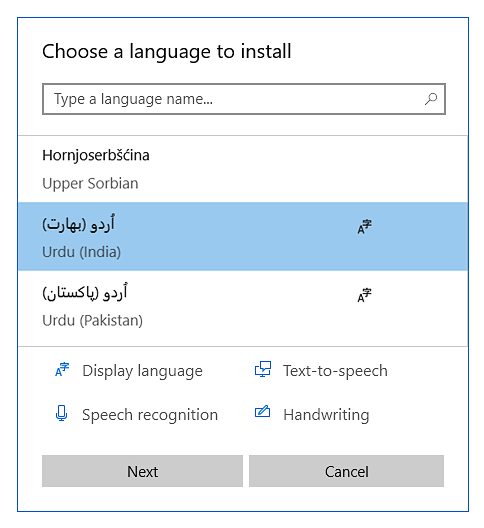
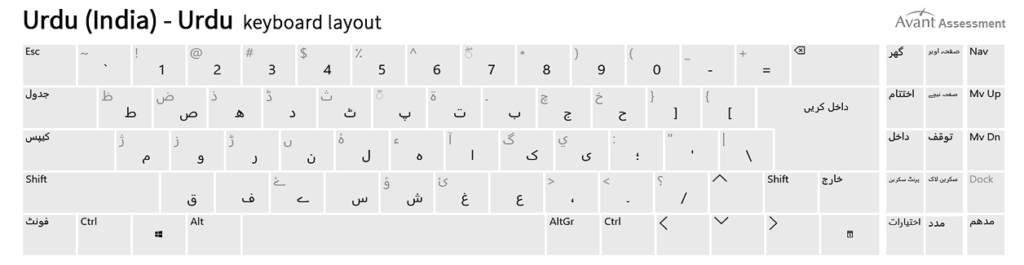
Urdu
Step 1. Add Urdu (India) as the language then add Urdu for the keyboard.

Step 2. Switch the keyboard to Urdu.
Step 3. Type in Urdu.
- Press Shift to access additional Urdu characters on the keyboard.
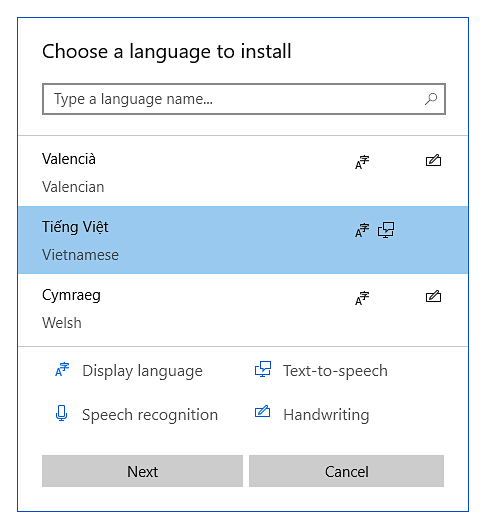
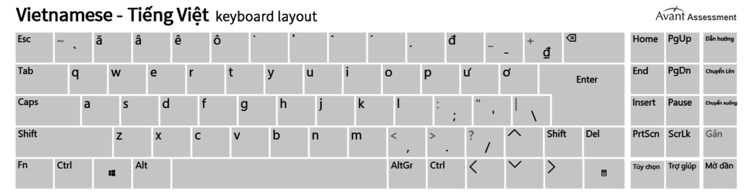
Vietnamese
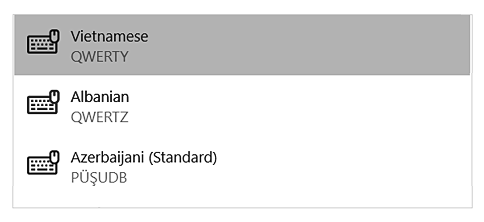
Step 1. Add Vietnamese as the language then add Vietnamese for the keyboard.
Step 2. Switch the keyboard to Vietnamese.
Step 3. Type in Vietnamese.
- Press Shift or Ctrl + Alt to access additional Vietnamese characters on the keyboard.
- The accented characters are created by typing numbers 1 – 0 and the + and [ ] keys.
*Avant Assessment has compiled the information in this guide to assist you in activating various language virtual keyboards on Windows 10 Operating Systems. Since software and hardware updates and changes occur quite frequently, these are only suggested processes that we have identified, tested and produced in these simple guides. If one of the processes outlined does not seem to work for your configuration, please check with the developer of your hardware and operating system for more specific support. There may be more updated information available through those resources. As always, Google is also a great resource to use if you are searching for assistance with this process as well.